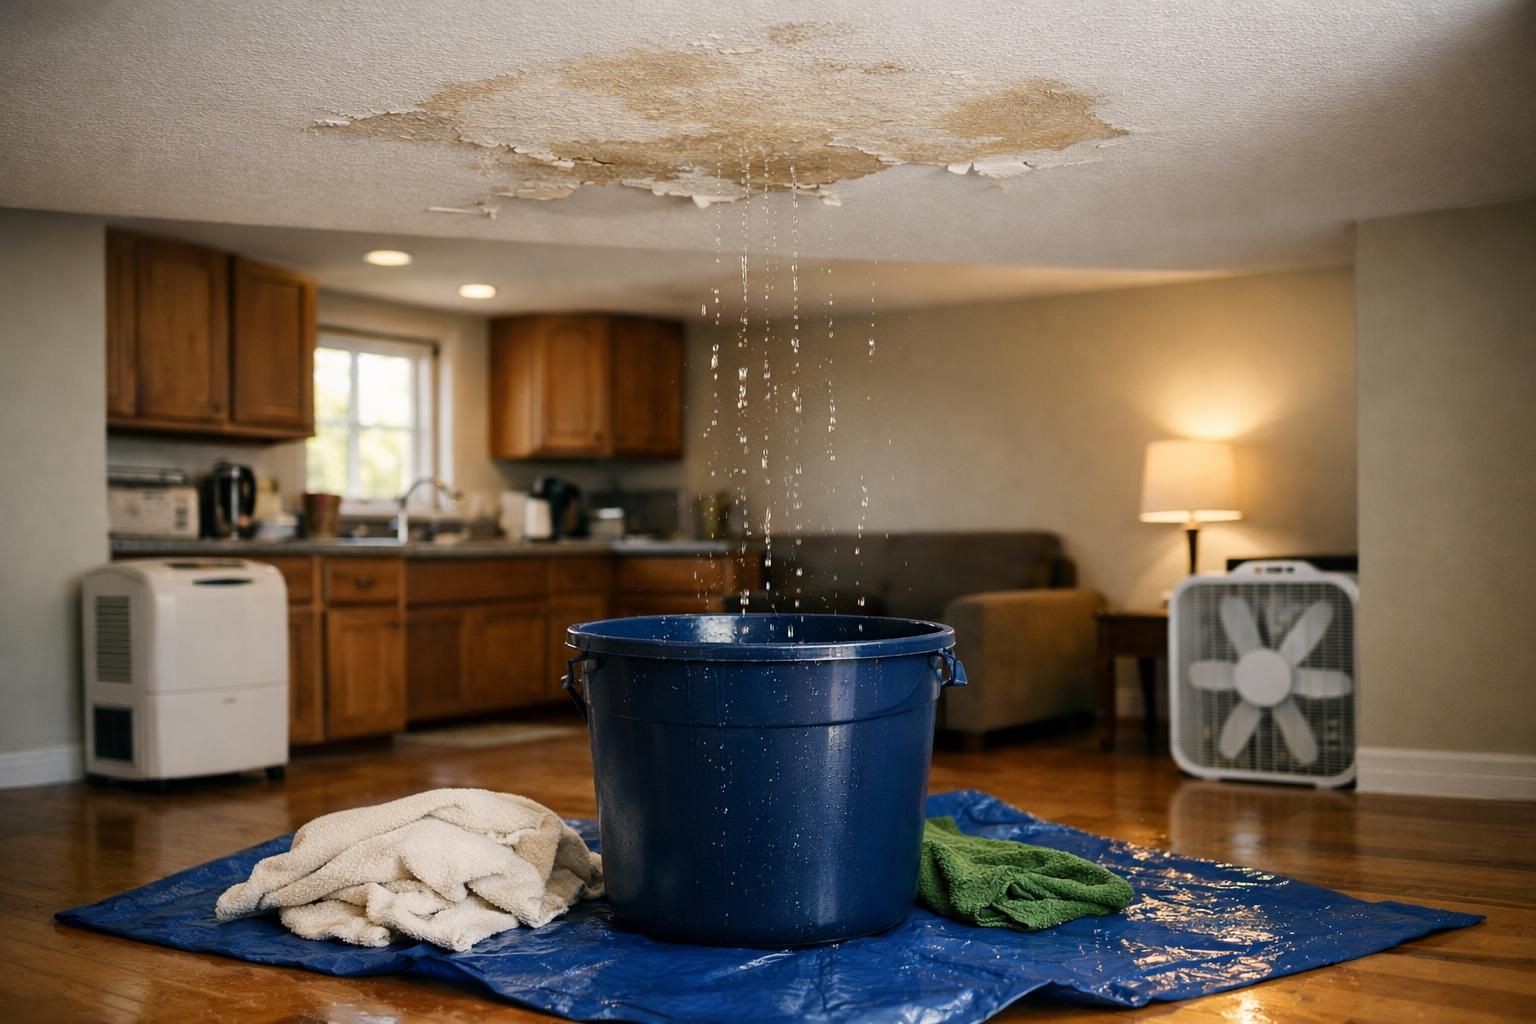
Water damage to kitchen cabinets gets ugly fast because cabinets are basically a stack of moisture-sensitive materials wrapped around a few hidden cavities. If you act early, you can often limit swelling, odors, and damage to the subfloor and walls. If you act late, the cabinet box may distort, fasteners loosen, and the toe kick area can stay damp long after everything looks “dry.”
In this guide, you’ll get a clear first-hour checklist, the why behind MDF and particleboard failures, and practical ways to inspect, dry, and decide what’s worth repairing versus replacing.
Best for: Homeowners dealing with a fresh sink, dishwasher, or supply-line leak where cabinets are damp but still structurally square.
Not ideal when: Cabinets are collapsing, sewage is involved, or water has been sitting long enough to cause strong odors and widespread swelling.
Good first step if: You can stop the water source, remove standing water, and get airflow moving while you assess the cabinet base and subfloor.
Call a pro if: You see repeated leaks, the subfloor feels soft, there’s suspected microbial growth, or drying requires removing cabinets or flooring.
Signs of Swelling
Swelling is usually the first visible sign of water damage to kitchen cabinets, and it typically starts where raw edges can drink in moisture. Check the bottom edge, toe kick, and shelf pin holes for raised ridges, rippling, or a “puffy” look that wasn’t there before. Run your fingers along seams and corners; swollen MDF often feels fuzzy, while particleboard can feel gritty or crumbly at the edge. If doors or drawers suddenly rub, that can also be swelling pushing the cabinet box slightly out of square.
Quick Summary
- Stop the water source first, then remove standing water before it wicks deeper into cabinet seams.
- Particleboard and MDF swell, crumble, and delaminate once they absorb water, especially at cut edges and screw holes.
- Check toe kicks and cabinet bases closely because they hold hidden moisture long after surfaces look dry.
- Drying works best with heat control plus steady airflow through the cabinet cavity, not just a fan pointed at the doors.
- Repair is realistic for cosmetic damage and minor edge swelling; replacement is common when the base is swollen or the box is out of square.
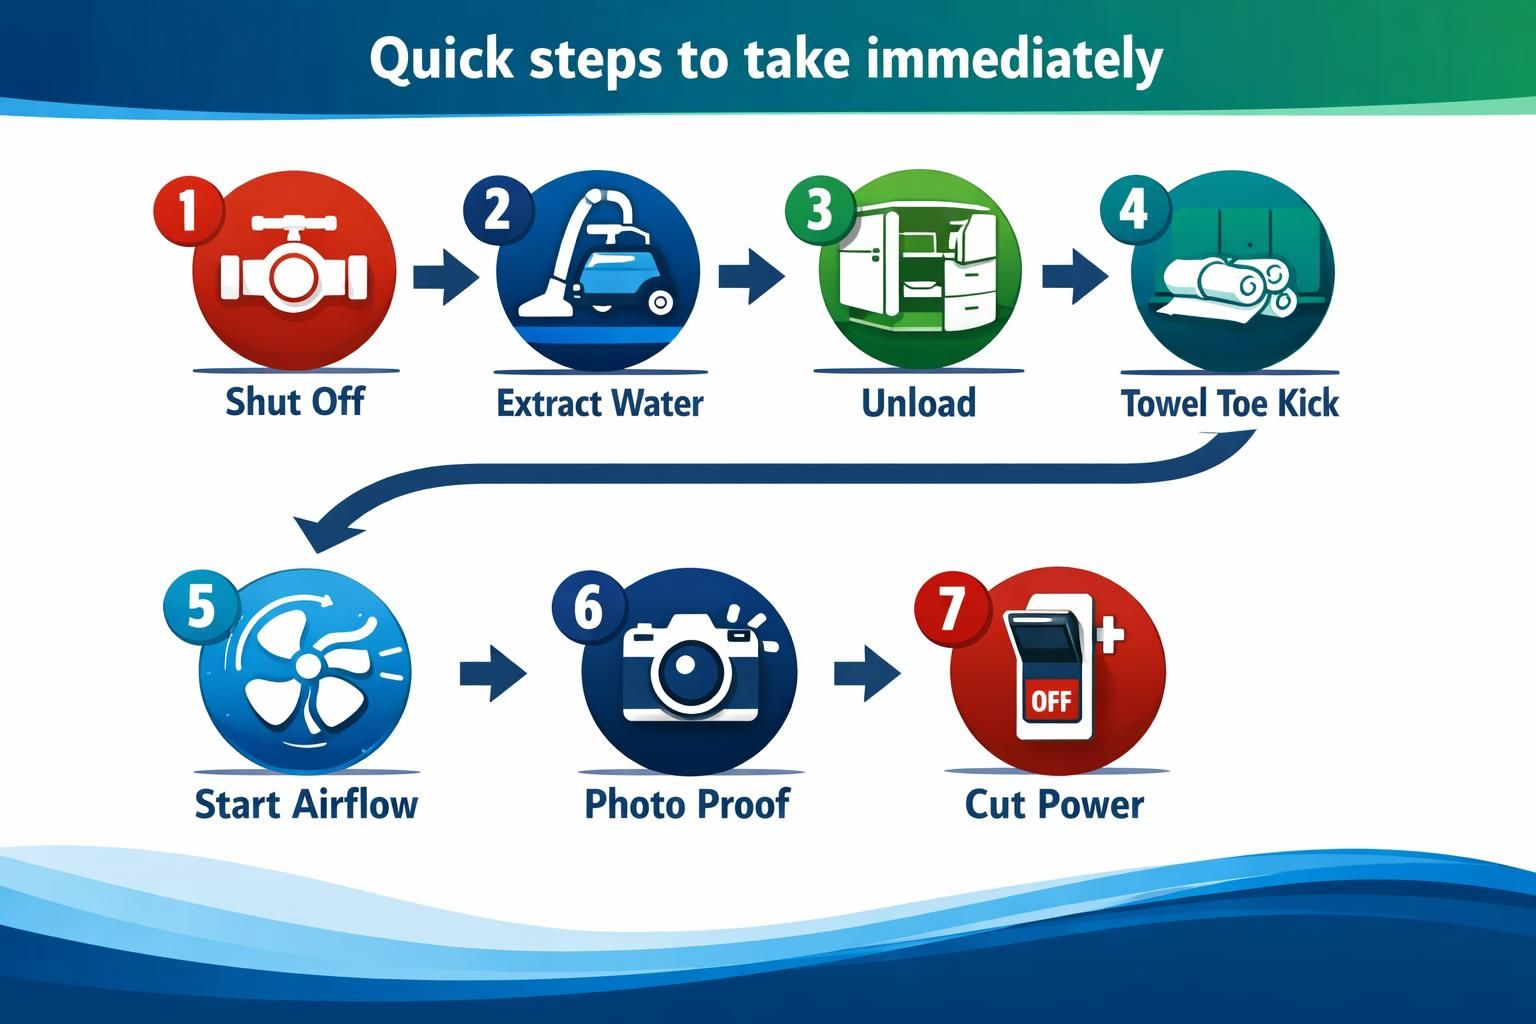
Quick Steps to Take Immediately
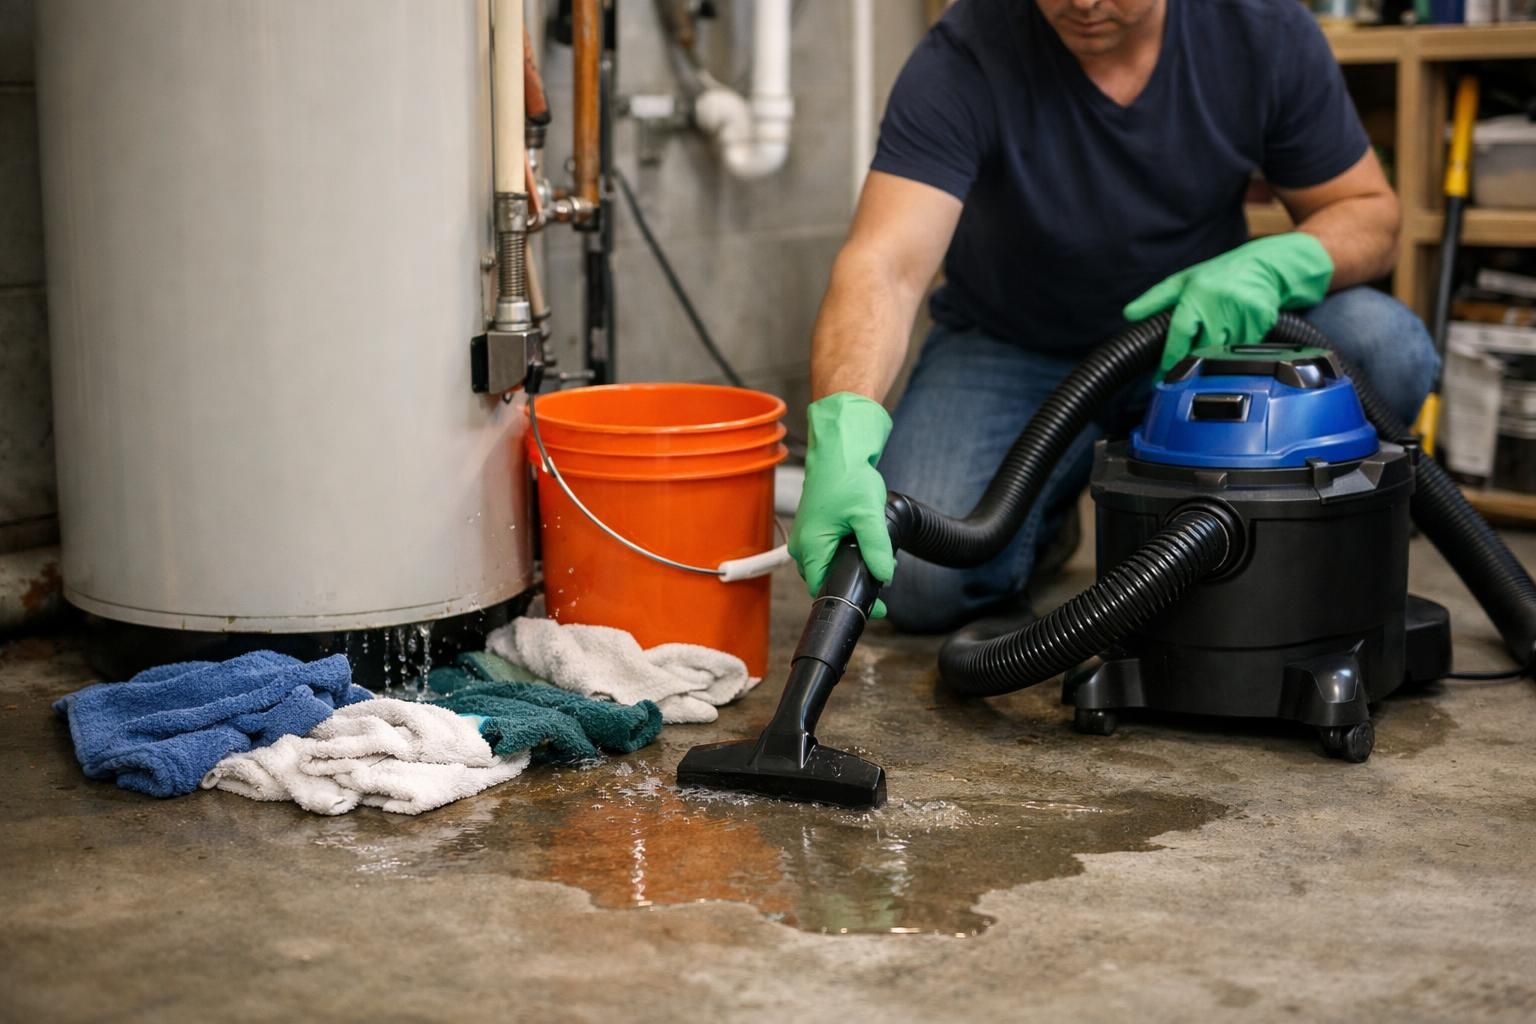
Act fast to limit swelling: stop the water, remove moisture, and start airflow. Shut off the under-sink valve or the main if you can’t isolate it. Blot and extract water, especially at the cabinet base. Unload the cabinet, pull drawers, and remove toe-kick vents or skins for access. Use a wet/dry vacuum at seams and corners, and check nearby rooms for spread. Photograph the source and staining lines. Open doors and aim a fan across the opening. If water may reach wiring, cut power. If symptoms persist, see signs of hidden damage.
Why Cabinets Fail After Water Damage (MDF and Particleboard Issues)
Cabinets fail after leaks because MDF and particleboard absorb water at exposed edges, and swelling rarely reverses. Solid wood may cup or stain, but engineered cores expand, lose strength, and stop holding screws. Particleboard fails fastest at the base, toe kick, and sink floor where cutouts leave raw edges; it swells, then veneer or laminate bubbles as adhesives release. After drying it often stays thicker and crumbly around fasteners. MDF can turn fuzzy under paint and telegraph ridges. Once the box goes out of square, doors misalign and drawers rub, so focus inspection on the bottom inches.
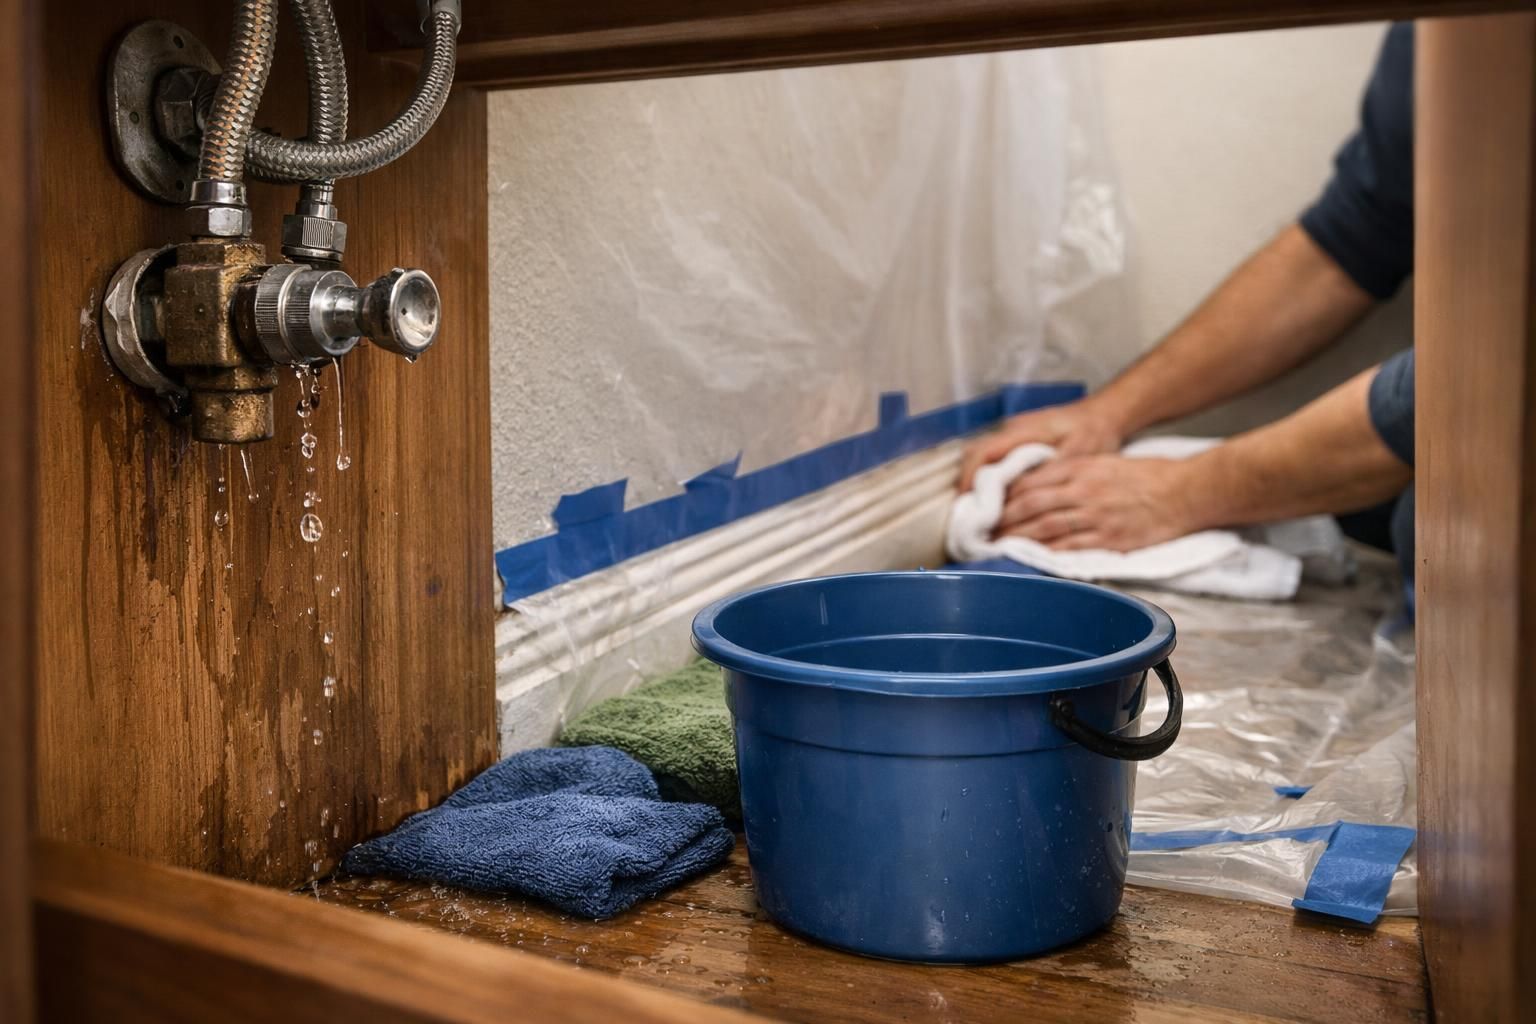
Stop the Leak and Protect Nearby Flooring and Walls
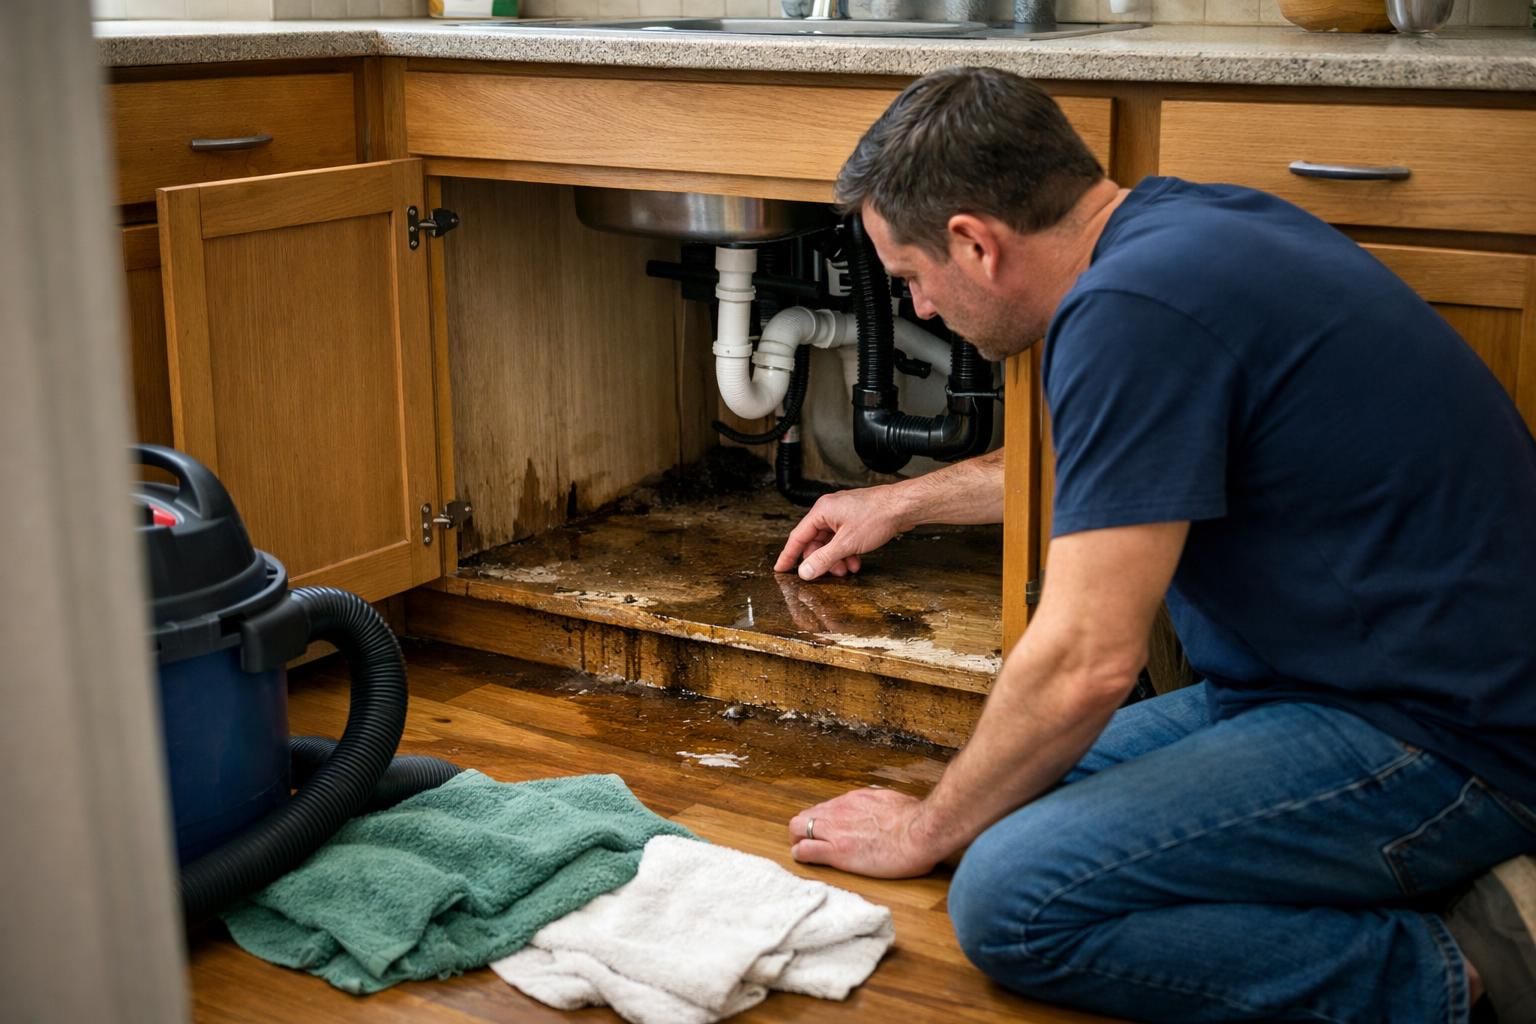
How to Check Cabinet Bases
Cabinet bases often turn cosmetic leaks into structural damage. Remove contents and drawers, then flashlight the bottom panel and corners for staining, rippling, or puffed seams. Press firmly at suspicious spots to see if the panel feels soft or spongy.
How to Check Cabinet Bases, Toe Kicks, and the Subfloor
Check the cabinet base and toe kick first because water pools there. Remove the toe kick or skin if possible, then use a flashlight and your hand to find swelling, grit, and staining lines. Press the sink cabinet floor and corners; if it dents, flakes, or feels like wet cardboard, the base is likely compromised. Next assess the subfloor in front of and under the sink. Spongy flooring, loose tile sounds, darkening from below, or sagging suggests spread. If concerned, see subfloor damage red flags for next steps.
Signs of Swelling, Delamination, and Microbial Growth
Swelling shows up at seams, edges, and fasteners. Look for raised ridges on the bottom edge, toe-kick bubbling, or a wavy cabinet floor. Delamination appears as blistered veneer, peeling melamine, or a soft spot that flexes.
Microbial issues may be hidden. Watch for musty odor, speckling, slimy residue, or stains that return after wiping. Recurring condensation inside the cabinet often means moisture is still trapped.
Hidden Moisture Behind Sinks and Dishwashers
Hidden moisture is common behind sink basins and dishwashers because airflow is limited. If safe, pull the dishwasher forward and inspect the floor edge and adjacent cabinet side. Leaks often show first as cabinet toe kick water damage because water runs forward and pools unseen.
Check raw-edge penetrations for supply, drain, and electrical lines; they wick water. If there’s a removable false front or access panel, remove it and inspect the face-frame back and wall with a mirror and flashlight.
Drying Strategy for Cabinets and the Cavity Behind Them
Drying works when air moves through the cabinet and behind it while humidity stays low. Open doors, remove drawers, and clear the base so air can sweep across and out. Two fans help: one pushes air in, one exhausts into the room. Run a dehumidifier with windows mostly closed to prevent reabsorption. Keep heat moderate to avoid warping veneers or softening adhesives. Remove wet liners or insulation and wipe residue before final drying. If wallboard behind the cabinet was wet, follow drywall water damage signs.
What Can Be Repaired vs What Usually Needs Replacement
Repair is often possible when the cabinet box stays square, the base is firm, and screws still bite. Best fixes are cosmetic: replace a toe-kick skin, touch up finish, swap a warped shelf, or add a reinforcement panel after everything dries. Minor edge swelling may be sanded and sealed, then hidden with trim, with mixed results. Replace when the base has expanded, panels delaminate, or the box racks out of square. Soft bottoms won’t hold alignment or countertop loads, and sink bases often fail again.
Odor Control and Mold Prevention After Cabinet Leaks
Odor control depends on stopping moisture, cleaning residue, and keeping humidity low long enough to stabilize. Wipe hard surfaces with mild detergent, rinse lightly, and dry again, but don’t soak particleboard edges. For musty smells, inspect low-airflow zones like toe-kick cavities, the underside of the sink deck, and back corners. Replace wet liners, cardboard organizers, and warped shelves that hold odor. Keep the cabinet empty until fully dry and odor-free, and run a dehumidifier during and after drying. Fix slow drips because long-duration dampness causes recurring odor. If growth appears or odor persists, treat it as contamination.
When to Call a Restoration Pro or Contractor
Call a pro when moisture is in hidden cavities or structural layers you can’t access, such as wet drywall behind the sink, suspected subfloor damage, or a swollen cabinet base. Call if you can’t stop the leak promptly or water may have reached electrical. Dishwasher leaks often spread under multiple boxes. Restoration pros measure moisture and manage drying, while contractors remove and rebuild. For what proper drying includes, see restoration process overview.
Conclusion
The best outcome with water damage to kitchen cabinets comes from a simple sequence: stop the leak, get water out fast, inspect the base and toe kick closely, then dry the cabinet cavity with airflow plus humidity control. Once you know whether the box stayed solid or the engineered core swelled and delaminated, the repair versus replace decision gets a lot clearer. Your practical next step is to document the damage, verify the leak source is truly fixed, and recheck for softness or odor after drying, because that’s where hidden problems usually reveal themselves.