Drywall water damage gets serious fast because sheetrock is basically a gypsum core wrapped in paper facing, and both parts hate staying wet. The good news is you can often catch it early, dry it correctly, and avoid a full tear-out. The tricky part is knowing when you’re looking at a cosmetic issue versus hidden moisture behind drywall that’ll turn into mold growth or a mushy wall. Below, you’ll learn how to size up urgency, spot obvious and sneaky symptoms, take smart first steps, and decide whether repair water damaged drywall is realistic or replacement is the safer move.
Best for: Homeowners who caught a leak early and need a clear plan to assess, dry, document, and repair without trapping moisture.
Not ideal when: You’ve got flood water, sewage, widespread sagging, or strong musty odor that suggests contamination or hidden mold.
Good first step if: You can stop the source, confirm power is safe, and start controlled drying while mapping the wet area.
Call a pro if: The ceiling is bulging, water touched electrical, moisture keeps spreading, or you suspect mold behind drywall.
Quick Summary
-
Drywall weakens quickly because the paper facing and gypsum core absorb water and lose strength.
-
Treat urgency based on source, spread, and whether the wall or ceiling is sagging or soft/spongy.
-
Signs range from water stains and bubbling paint to musty odor, soft spots, and even a higher water bill.
-
Drying works only when water is clean, the area is limited, and you open things up enough to avoid trapped moisture.
-
Replacement is the safer call with contamination, crumbling drywall, or any confirmed mold growth.
Quick Assessment: How Urgent is Your Drywall Water Damage?
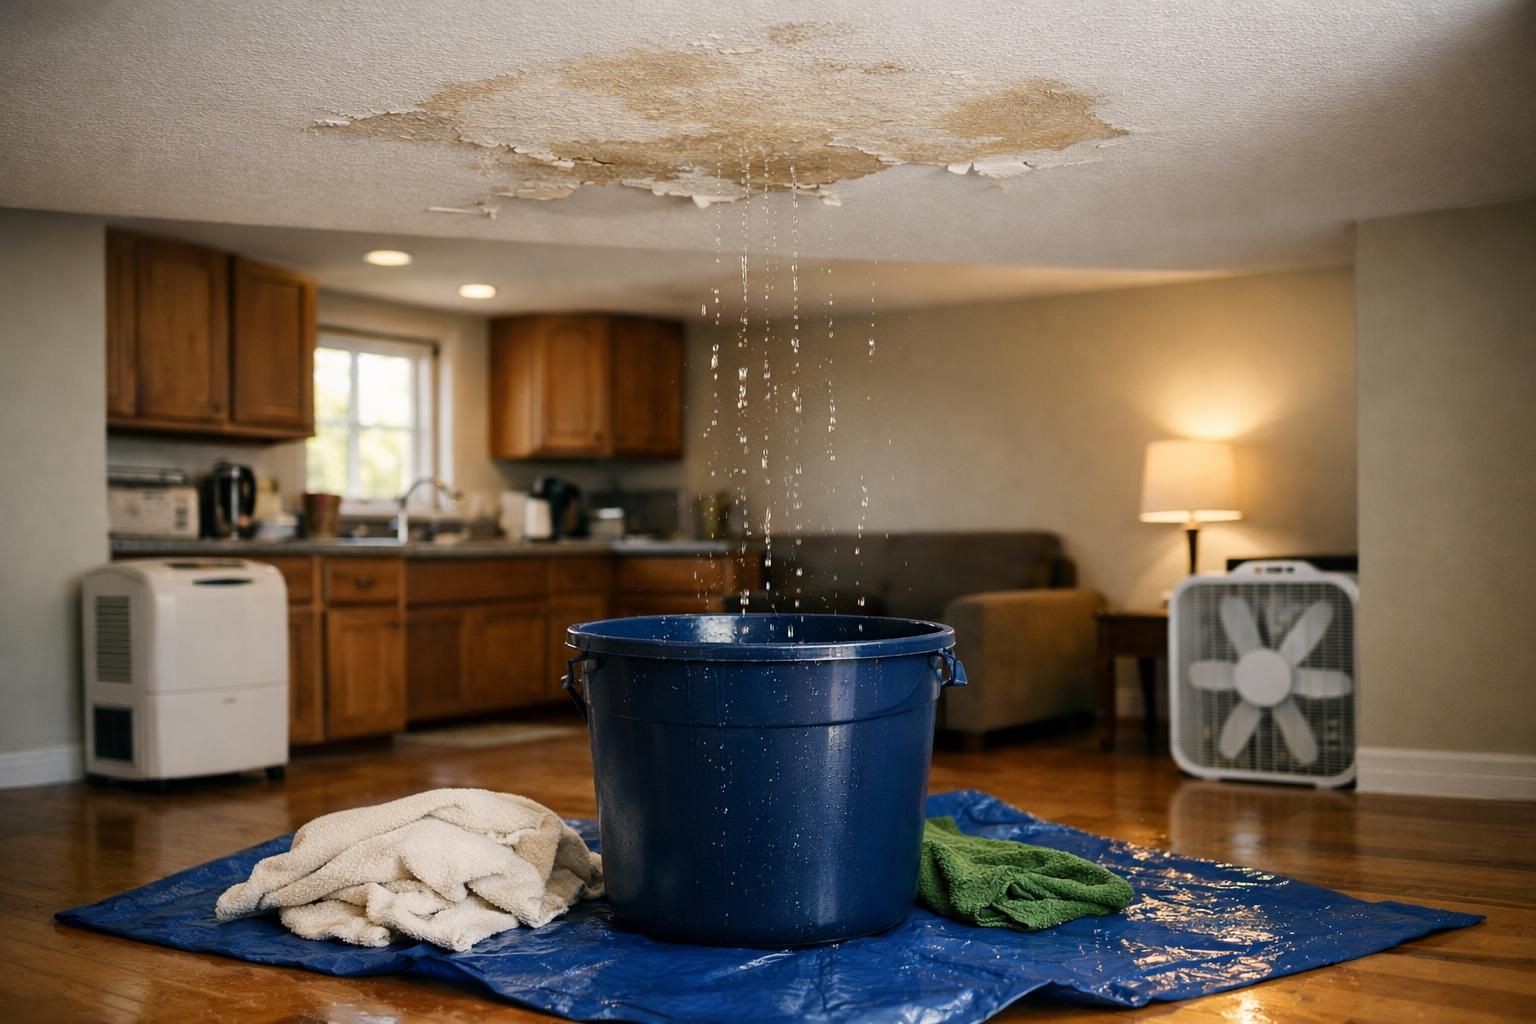
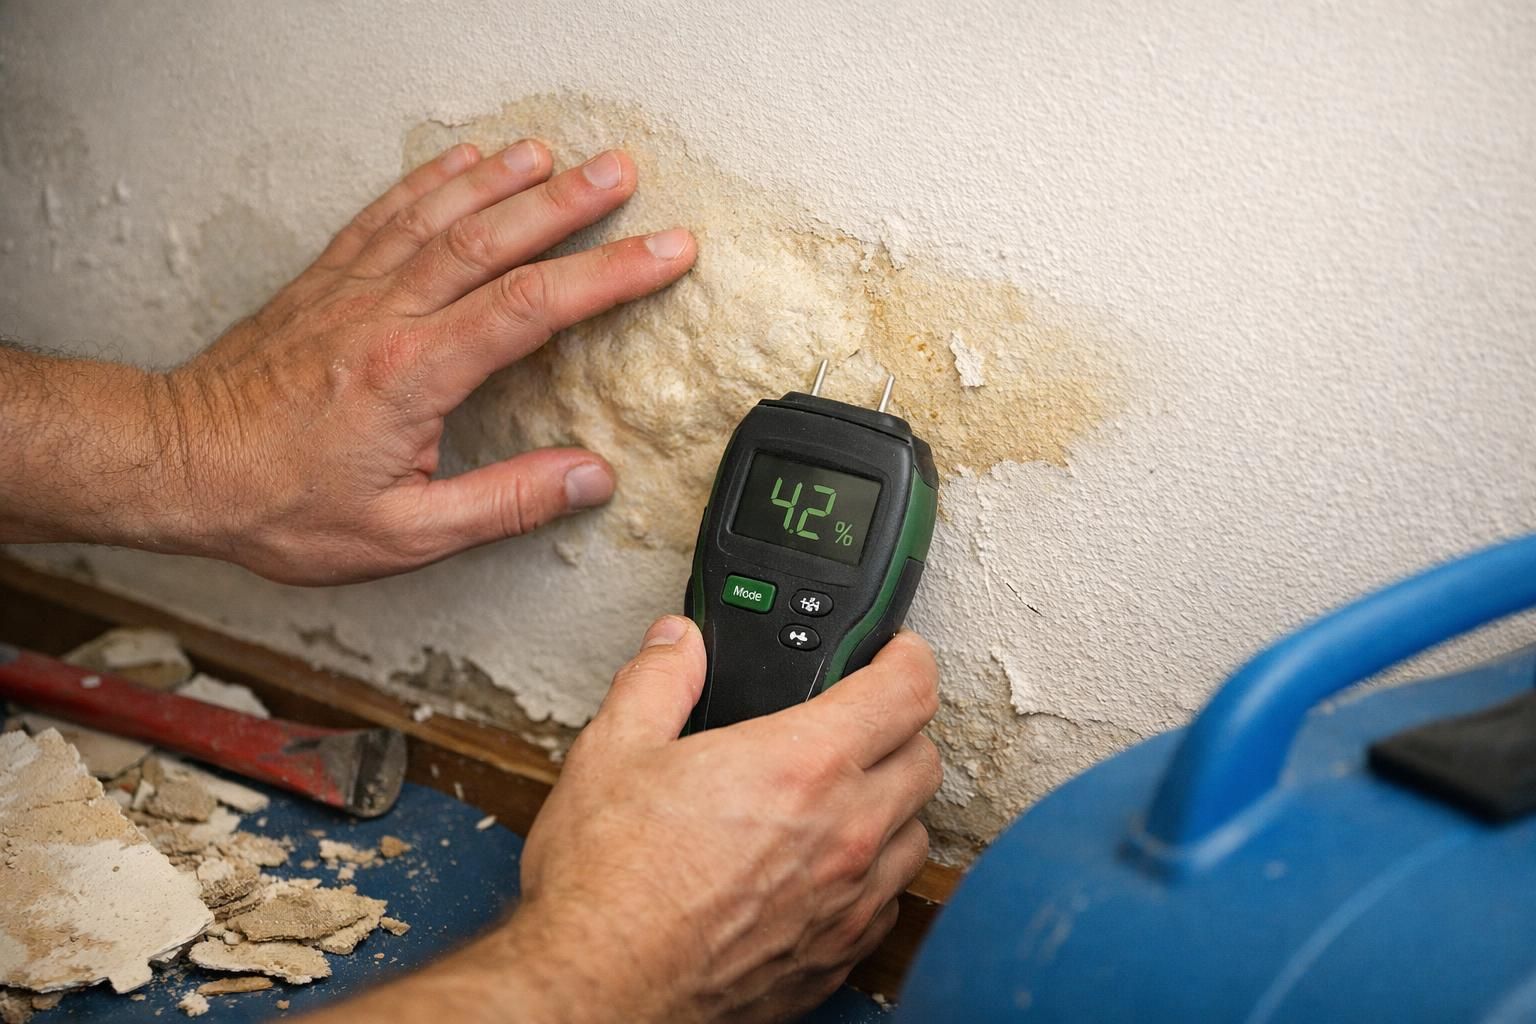
It’s urgent if the source is active, drywall is sagging/bulging, or electrical safety is uncertain. Identify the cause, then map the wet area beyond the stain because water travels along framing. Use a moisture meter; IR can help but isn’t definitive. If the spot grows, feels spongy, or you hear water in the wall, act fast.
The 24–48 Hour Mold Window
Mold risk ramps up quickly once paper facing stays damp, so waiting around is a gamble. In practice, you want drying/dehumidification started right away and you want wet cavities to be able to breathe. If you can’t get the moisture down or you suspect hidden moisture behind drywall, you’re already drifting toward removal and professional water mitigation.
Common Signs of Drywall Water Damage
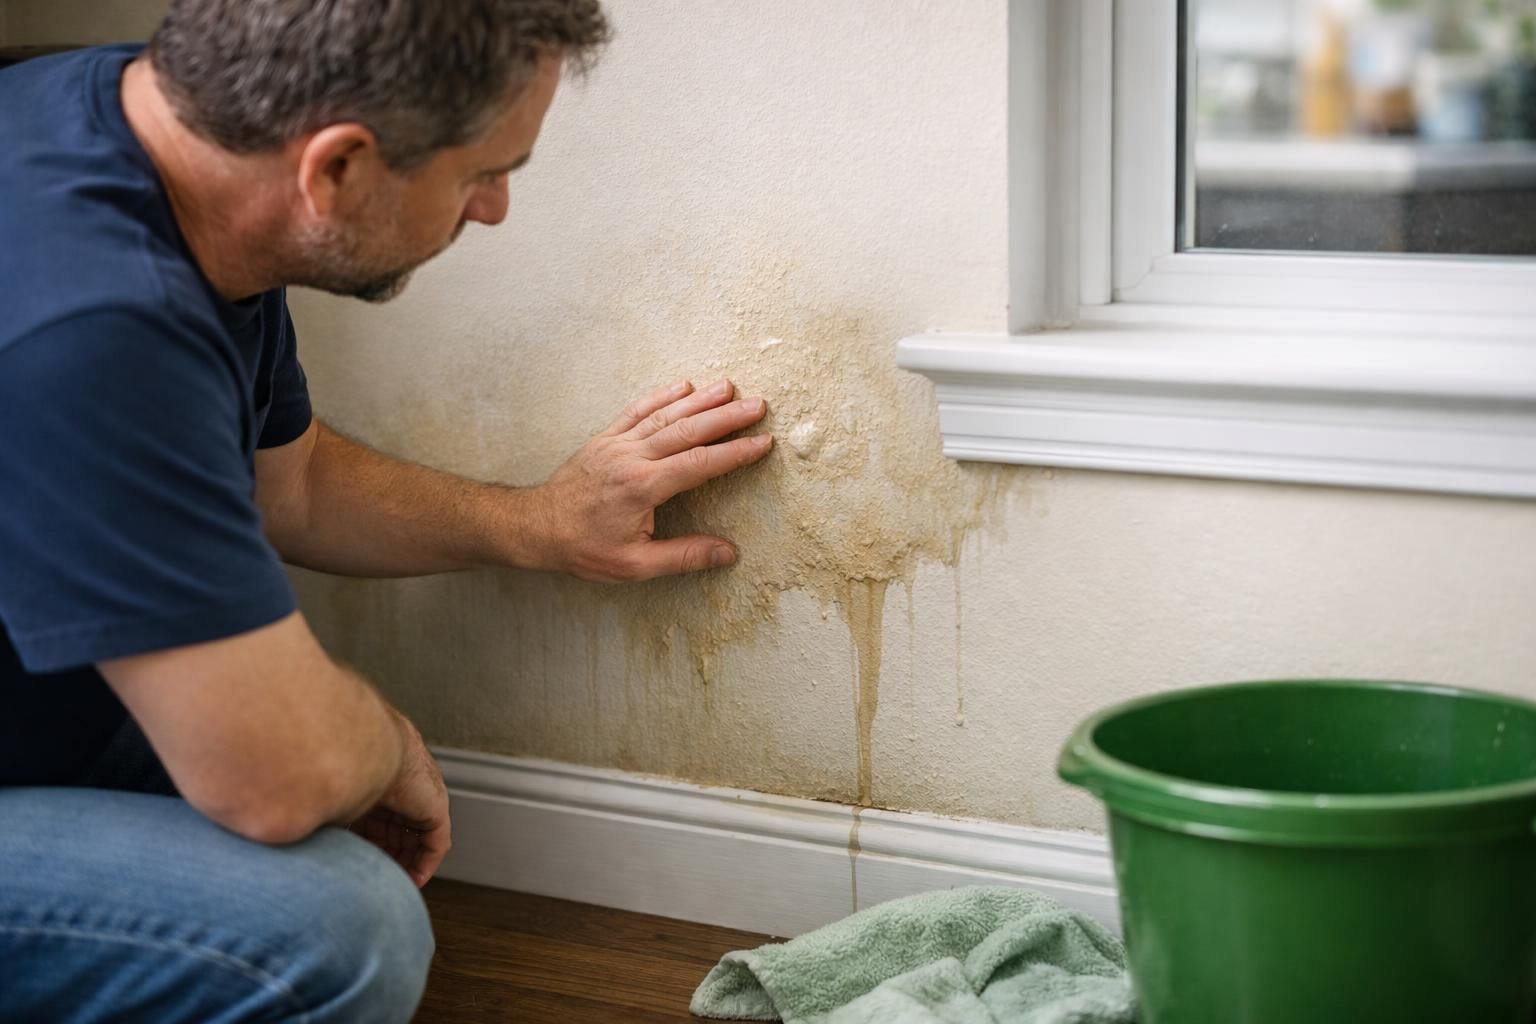
Don’t judge by the stain alone; combine sight, touch, and smell. Drywall often progresses from discoloration and bubbling paint to texture changes, then softness or crumbling. Location matters: under windows suggests exterior intrusion, ceilings suggest roof or plumbing above, and lower walls suggest flooding or a stud-bay leak. Renters should follow tenant steps after a leak. A higher water bill can signal a slow leak.
Visual Signs (Stains, Bubbling Paint, Warping)
Common visual signs include stains,
Hidden Signs (Musty Odor, Soft Spots, Higher Water Bills)
Hidden clues include musty odor, spongy drywall, and cool/damp walls after the surface looks dry. Press near baseboards and around outlets for give. A sudden higher water bill or water sounds in walls suggests an active leak. Persistent irritation can indicate mold behind drywall.
First Steps to Take Immediately
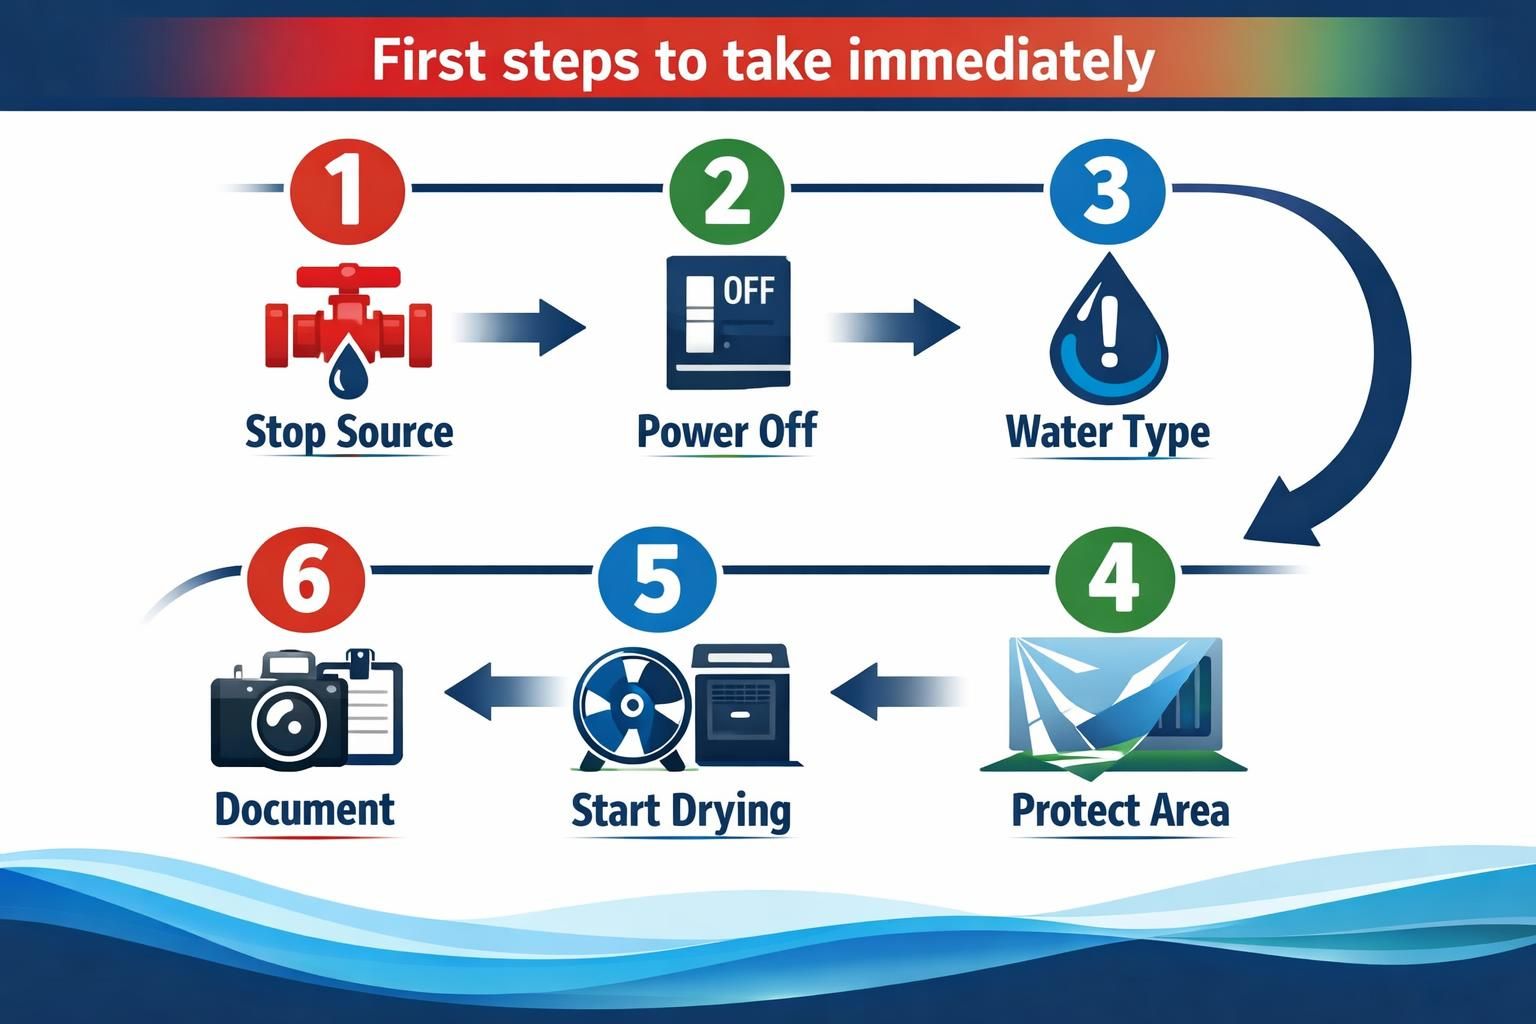
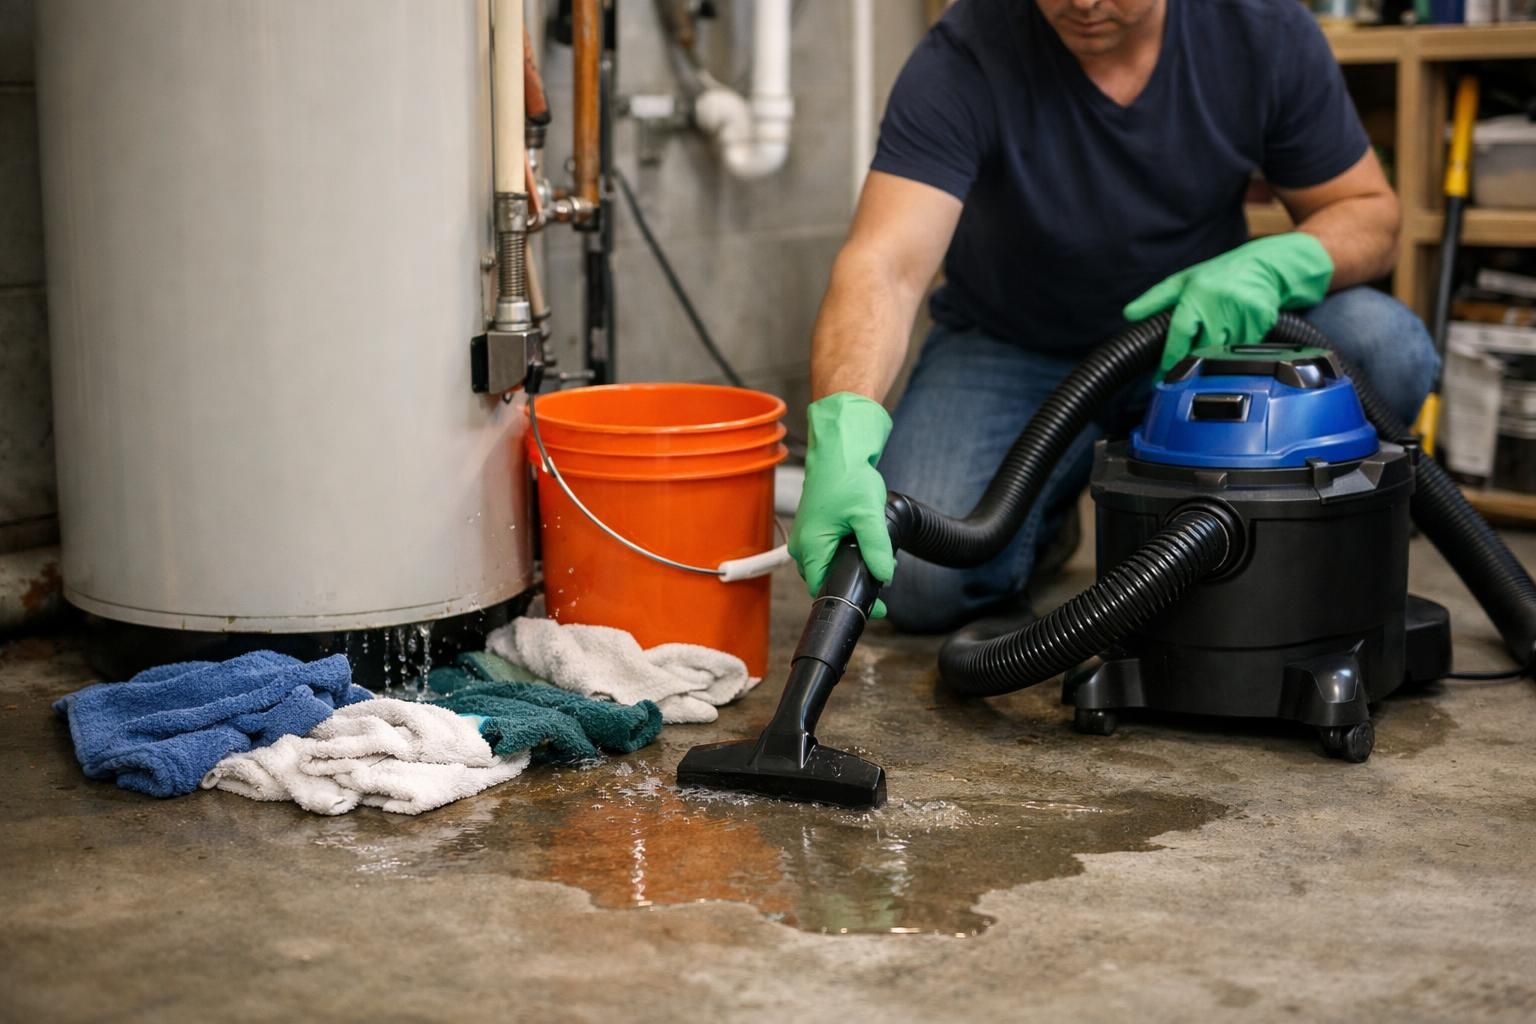
Stop the Source + Safety Checks (Electricity, Contaminated Water)
Electricity comes first, especially near wet ceilings, outlets, or breakers. If unsure, shut off power and use when to shut off power. Classify the water: clean supply leaks differ from flood/sewage, which need PPE and usually removal, not just drying.
Drying and Documenting for Insurance
Dry by increasing airflow and lowering humidity. Run a fan across surfaces and a dehumidifier, and open small access points if the cavity needs venting. Follow dry a room the right way. For insurance, photograph damage, source, removed materials, and record any moisture readings.
Can Wet Drywall Be Saved or Does it Need Replacement?
Sometimes you can save drywall, but only if it can dry completely and isn’t contaminated or weakened. The surface may dry while the gypsum core stays damp. Decide based on water type, how long it was wet, affected size, and any warping or softness. Also check the cavity: soaked insulation or wet framing keeps re-wetting the board and prevents room-side drying. Moisture testing and proper drying can prevent bubbling paint returning later.
Repairable Situations (Small Area, Clean Water, Caught Early)
Usually repairable means a small area, clean water, and early discovery while drywall is still firm. Minor staining or small peeling near a known leak can be manageable if you dry thoroughly. Confirm dryness, then use stain-blocking primer and repaint.
Must-replace Situations (Sagging, Crumbling, Mold, Sewage/floodwater)
Replace drywall if it sags, bulges, crumbles, shows mold, or was touched by sewage/floodwater. Contaminated water makes porous materials unreliable to sanitize. Persistent musty odor or spotting at seams and corners points to removal and possibly mold remediation.
How to Repair Water-damaged Drywall (DIY Overview)
Treat repairs like a small rebuild: remove compromised material, dry what remains, then patch and refinish. The big mistake is sealing with mud or paint before the area is truly dry and the leak is fixed. Use a moisture meter if you’re unsure. Prime with a stain-blocking primer so marks don’t bleed through. Most results come from careful prep, sanding, and cleanup.
Patch Vs. Full Section Replacement (What’s Involved)
Patch when damage is localized and surrounding drywall is solid. Cut a square, add backing, screw in a patch, tape, mud in thin coats, sand, prime, and paint. Replace a full section when seams fail, the board warps, or multiple soft areas suggest hidden spread. Never trap damp insulation behind new drywall.
Cost Factors and When to Hire a Professional
Cost depends less on the stain and more on how far water spread and what stayed wet inside the wall. Small jobs may only need drying, a cut-out, patch, and paint. Bigger events can require extraction, insulation removal, framing treatment, drying equipment, and rebuilding. Recurring bubbles usually mean hidden moisture or an unfixed source, like HVAC condensation. Pros use moisture tools and drying plans; review how water damage spreads. Hire help for sewage/floodwater, sagging ceilings, or multi-room drying.
Typical Repair Vs. Restoration Scenarios
Typical repair: a small leak fixed quickly, limited drying, then patch and paint. Restoration: flood damage or long seepage requiring staged removal, drying/dehumidification, and sometimes mold remediation before rebuilding. The key is verified dry and clean materials.
Conclusion
If you spot drywall, take a moment to inspect it closely for signs of damage, water stains, soft or crumbling areas, bubbling paint, visible mold, or sagging panels, because early detection can prevent larger repairs. Photograph the affected area, note the size and location, and try to identify the cause (leak, condensation, structural movement) before attempting any fixes. For small, dry, superficial blemishes you can often sand, patch with joint compound, prime, and repaint; for moisture-related damage, mold, extensive cracking, or structural concern, shut off the water source if applicable and contact a qualified contractor or remediation specialist. Use basic precautions like wearing a dust mask and gloves when cutting or sanding, and consider temporary measures (tarps, dehumidifiers, ventilation) to limit further harm while you arrange a proper repair. Regularly check nearby plumbing, roofing, and exterior seals to reduce recurrence and keep records of repairs and inspections for future reference.