A burst pipe can turn a normal day into a fast-moving mess, especially if water is spreading into walls, flooring, or rooms below. Knowing what to do after a burst pipe helps you reduce damage, protect your safety, and make repairs easier. The first goal is to stop the water and make the area safe. The second is to remove water and dry everything quickly enough to prevent lingering moisture issues. Finally, you will want to document what happened and plan repairs so it does not repeat. This guide walks you through immediate actions, practical drying and inspection steps, and when it makes sense to bring in professional help.
- Shut off water fast and isolate the affected area to limit spread
- Prioritize safety around electricity, slippery floors, and possible contaminated water
- Remove standing water and start drying right away to reduce secondary damage
- Check for hidden moisture in walls, ceilings, and flooring transitions
- Document damage and actions taken so insurance and repairs go smoothly
Quick steps to take immediately
When a pipe bursts, time matters. Start by confirming the problem and acting as if water will keep traveling until you stop it. If you are unsure how to tell if a pipe burst, look for sudden loss of water pressure, water stains that appear quickly, pooling water near walls, or the sound of rushing water when no fixtures are running.
Move quickly through a simple sequence: stop the water, shut down any risks, and limit spread. Close nearby fixture valves if you can reach them safely. Move pets and people away from the wet zone. If water is near outlets, appliances, or a breaker panel, treat it like an electrical hazard until power is handled safely. Then begin removing water and drying as soon as the situation is stable.
Safety first: electricity, slipping hazards, and contaminated water
Water and electricity are a dangerous mix. If water is approaching outlets, power strips, appliances, or anything plugged in, avoid stepping into pooled water. If you can access the electrical panel without walking through wet areas, turn off power to the affected rooms, or shut off the main breaker if needed. If you cannot reach the panel safely, wait and get help rather than taking a risk.
Slipping hazards are immediate and easy to underestimate. Wet tile, vinyl, sealed concrete, and stairs can become slick quickly. Wear shoes with grip and clear pathways as you work. Also consider water quality. A burst supply line is often clean at first, but water can become contaminated after contacting insulation, debris, or overflowing drains. If water appears cloudy, smells unusual, or came from a drain line, treat it as contaminated: avoid skin contact, keep children away, and plan more thorough burst pipe cleanup.
Stop the source and limit spread
Move quickly through a simple sequence: stop the water, shut down any risks, and limit water damage from spreading. Close nearby fixture valves if you can reach them safely. Move pets and people away from the wet zone. If water is near outlets, appliances, or a breaker panel, treat it like an electrical hazard until power is handled safely. Then begin removing water and drying as soon as the situation is stable.
Stopping the flow is the most important thing to do when a pipe bursts because it reduces how much water your home absorbs. If the break is localized, you may be able to shut off a nearby fixture valve or a branch valve. If you are unsure, go straight to the main shutoff. Once the flow stops, you are no longer racing against continuous flooding, and drying becomes much more effective.
After water is off, think like water. It travels downhill, under baseboards, and into seams. Use towels, rags, and temporary barriers to redirect flow away from stairs, floor vents, and doorways. Close interior doors to isolate the wet zone, and open a path for you to carry wet items out without tracking water everywhere. If safe, lift the edges of rugs and use towels underneath to slow wicking.
Shut off the main water supply (if needed)
Locate the main shutoff before you need it, but if you are reading this mid-emergency, check common spots: where the water line enters the home, near a utility room, basement, garage, or an exterior wall. Turn the valve until it stops. If it is a lever-style valve, it is typically off when perpendicular to the pipe.
Once shut off, open a faucet at a lower level to confirm water is truly off and to help drain the line. If the pipe burst is on a hot water line, consider turning off the water heater as well, following the unit’s safe shutdown steps. If you cannot find the shutoff or it will not turn, call for help right away. Continuing flow can saturate materials quickly and turn a manageable pipe burst cleanup into a larger restoration job.
Slipping hazards are immediate and easy to underestimate. Wet tile, vinyl, sealed concrete, and stairs can become slick quickly. Wear shoes with grip and clear pathways as you work. Also consider water quality. A burst supply line is often clean at first, but water can become contaminated after contacting insulation, debris, or overflowing drains. If water appears cloudy, smells unusual, or came from a drain line, treat it as contaminated: avoid skin contact, keep children away, and plan more thorough burst pipe cleanup, while considering whether to turn off electricity after a water leak.
Relieve pressure and protect fixtures
After shutting off the main, relieve pressure in the plumbing system. Open a couple of faucets, including one at the highest point in the home and one at the lowest point. This helps drain remaining water and reduces additional leaking if a damaged section is still weeping.
Protect fixtures and drains from debris. If ceiling material, insulation, or wall fragments are wet and crumbling, keep sinks and tubs clear so debris does not cause a clog. If a ceiling is bulging from trapped water, do not stand beneath it. Water weight can release suddenly. Place a bucket under drips and, if you can do so safely, poke a small hole at the lowest bulge to let water drain in a controlled way. If you are uncomfortable with that step, skip it and focus on keeping people away from the area until help arrives.
Remove standing water and protect belongings
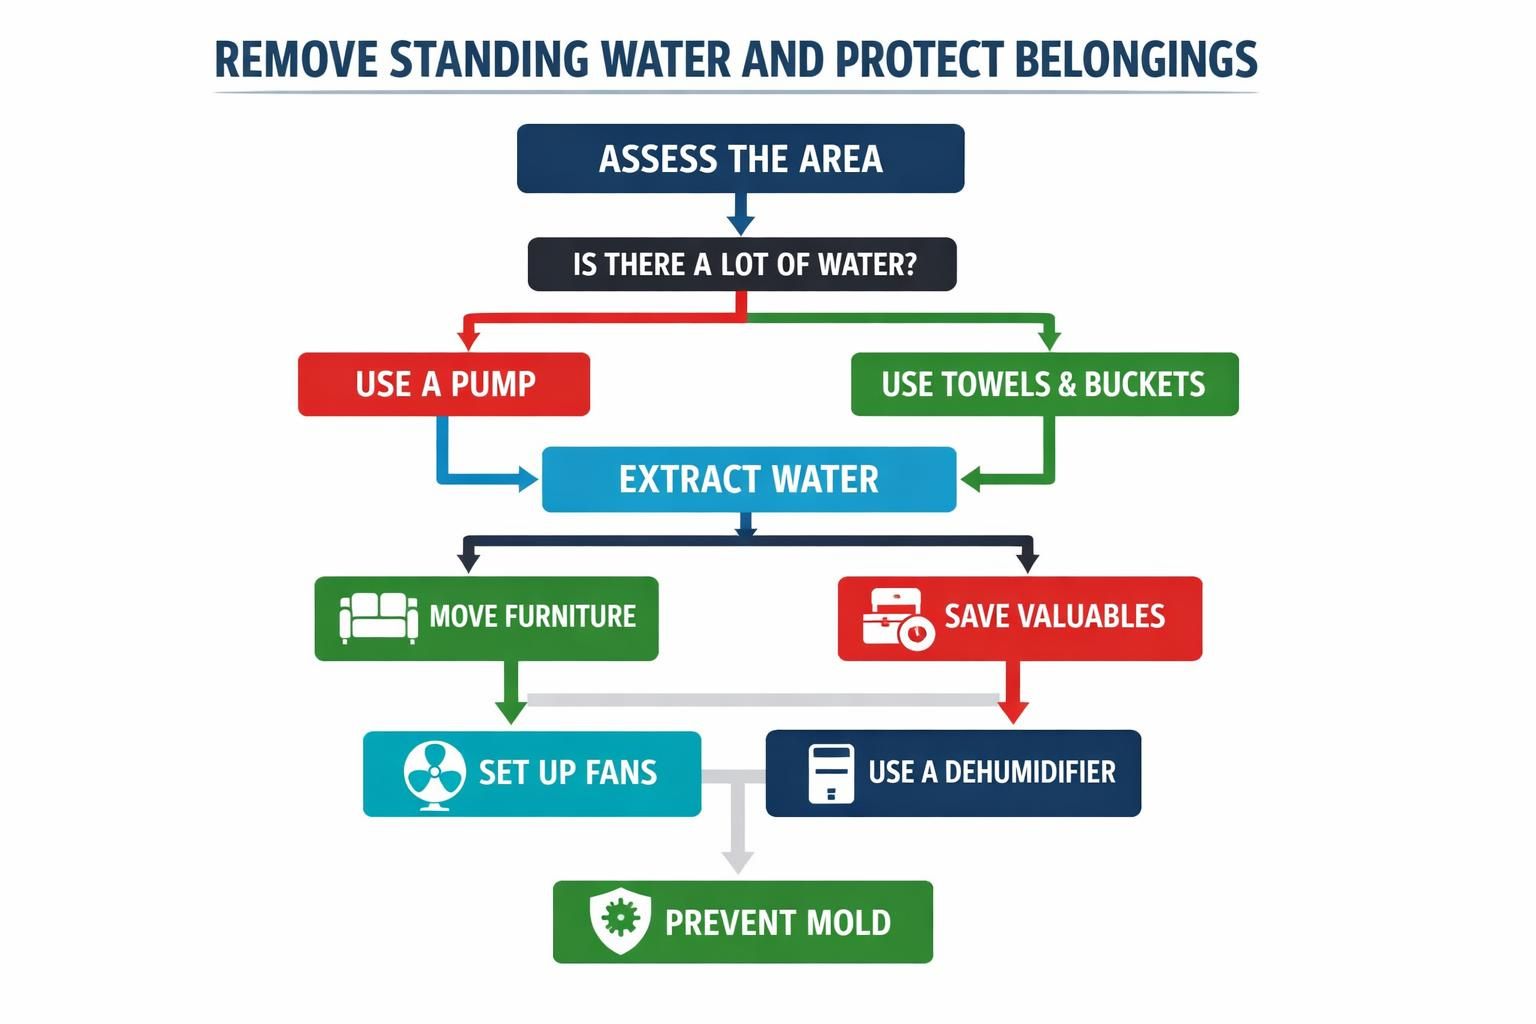
With the source stopped, remove standing water as soon as possible. The method depends on volume. For small areas, towels and mops can work. For larger pooling, a wet/dry vacuum is useful, but only if the area is not electrically risky. Keep the vacuum plug and extension connections away from wet zones, and never use standard household vacuums for water.
As you work, protect belongings to prevent additional loss. Move furniture, boxes, and electronics out of the wet area. If you cannot move heavy furniture, lift legs onto wood blocks, plastic caps, or folded towels to reduce water absorption. Pull curtains away from wet floors and remove artwork from damp walls. A simple triage list can help you prioritize:
- Electronics and power cords
- Paper items, photos, and books
- Upholstered furniture and mattresses
- Rugs and removable flooring pieces
- Clothing and soft goods in closets near wet walls
Dry the area fast (fans vs dehumidifiers)
Drying is where many people lose time. Surface water may be gone, but moisture can remain in padding, subfloors, and wall cavities. Air movement and dehumidification work together: fans move moist air off surfaces, and dehumidifiers pull moisture out of the air so drying continues efficiently.
Drying is where many people lose time. Surface water may be gone, but moisture can remain in padding, subfloors, and wall cavities. Air movement and dehumidification work together: fans move moist air off surfaces, and dehumidifiers pull moisture out of the air so you can effectively dry a room after a water leak so drying continues efficiently.
Use fans to push air across wet floors and toward a more open space, but avoid blasting air directly into a wall cavity unless you know how it is constructed and can remove wet materials safely. A dehumidifier is often the workhorse for burst pipe cleanup because it reduces humidity, which helps everything dry faster and discourages musty smells. If outdoor humidity is low, opening windows can help. If it is humid outside, keep windows closed and let the dehumidifier do its job. Keep drying going until materials feel fully dry, not just the top layer.
Check for hidden water in walls, floors, and ceilings
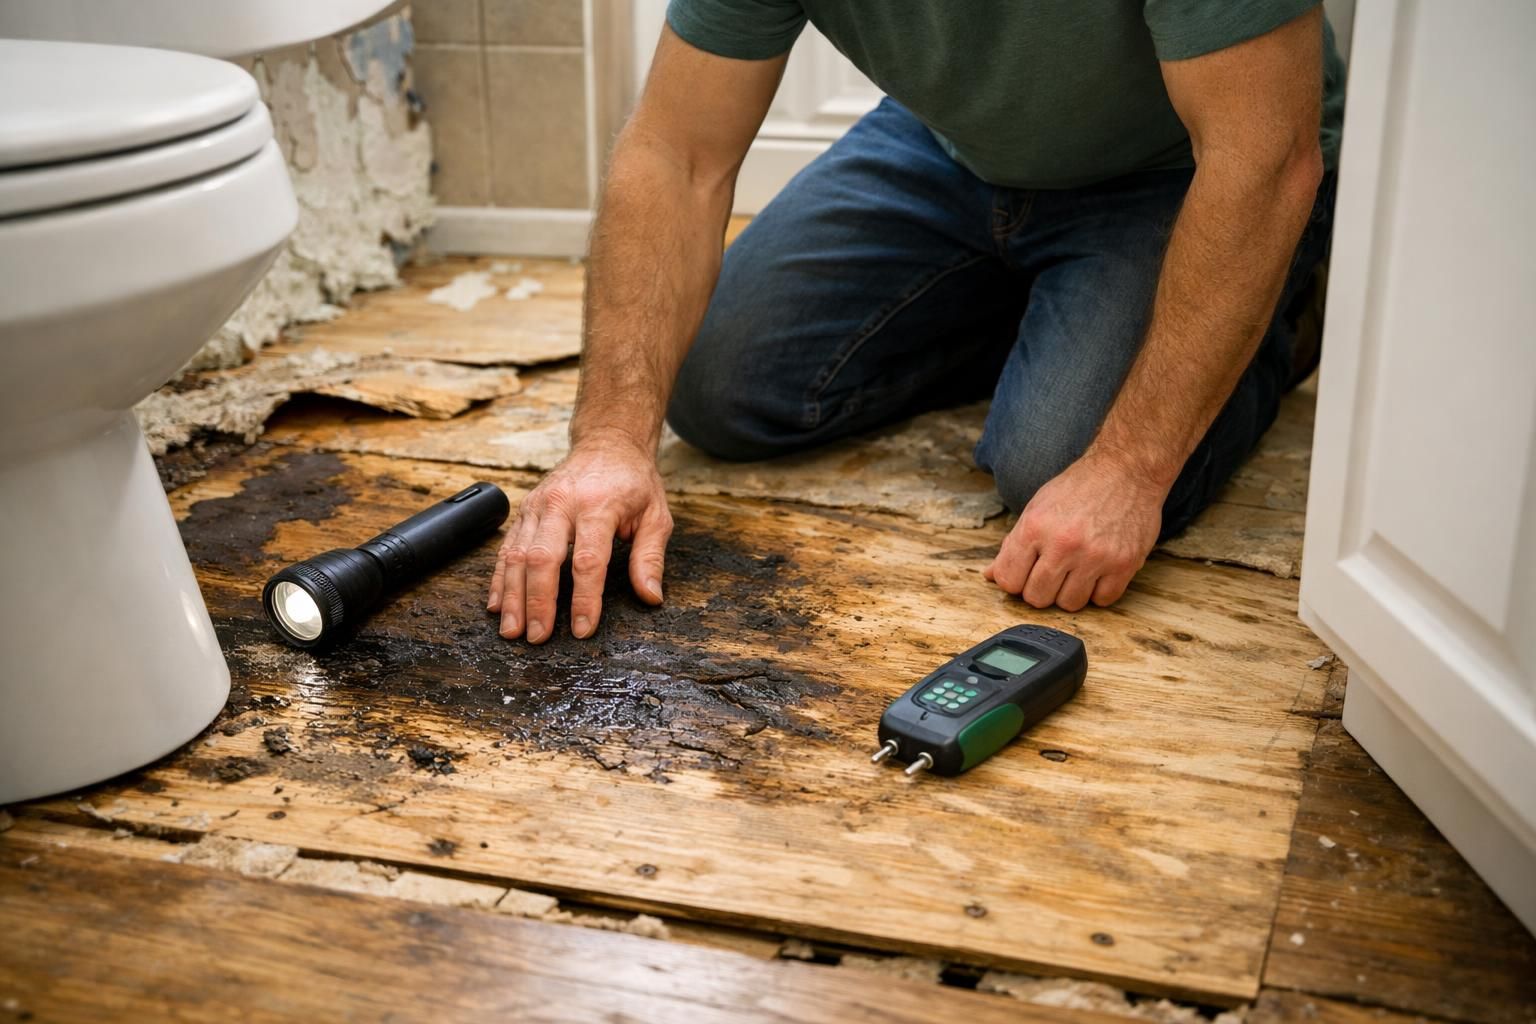
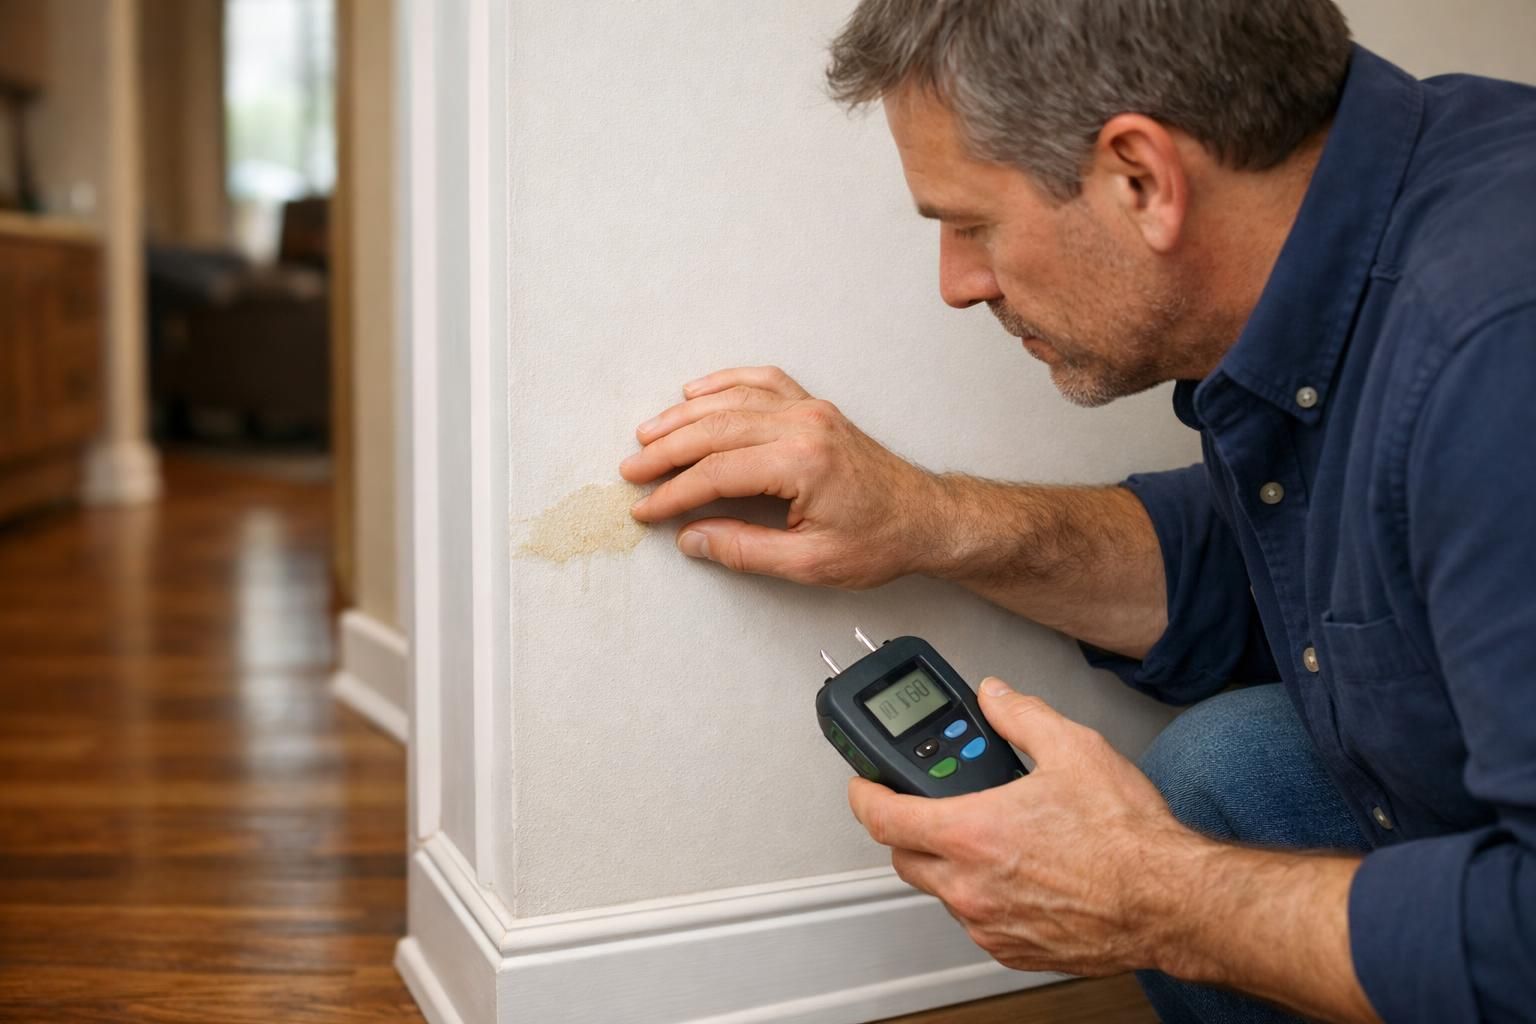
Hidden moisture is a common reason people think the problem is solved when it is not. Water can travel along framing, behind baseboards, under flooring edges, and into insulation. Watch for warning signs: soft drywall, swelling baseboards, bubbling paint, warping floors, or new stains on ceilings below the leak.
If you have access to a moisture meter, use it to compare affected areas with dry areas to understand what is still wet. Without tools, use observation and touch: press gently on drywall, check corners, and look behind furniture. Sniff for damp odors that persist after drying. If a ceiling below the burst pipe area shows discoloration or feels spongy, treat it seriously. In some cases, a small inspection hole in an inconspicuous location is safer than leaving moisture trapped, but only do this if you are comfortable patching later and can do it safely.
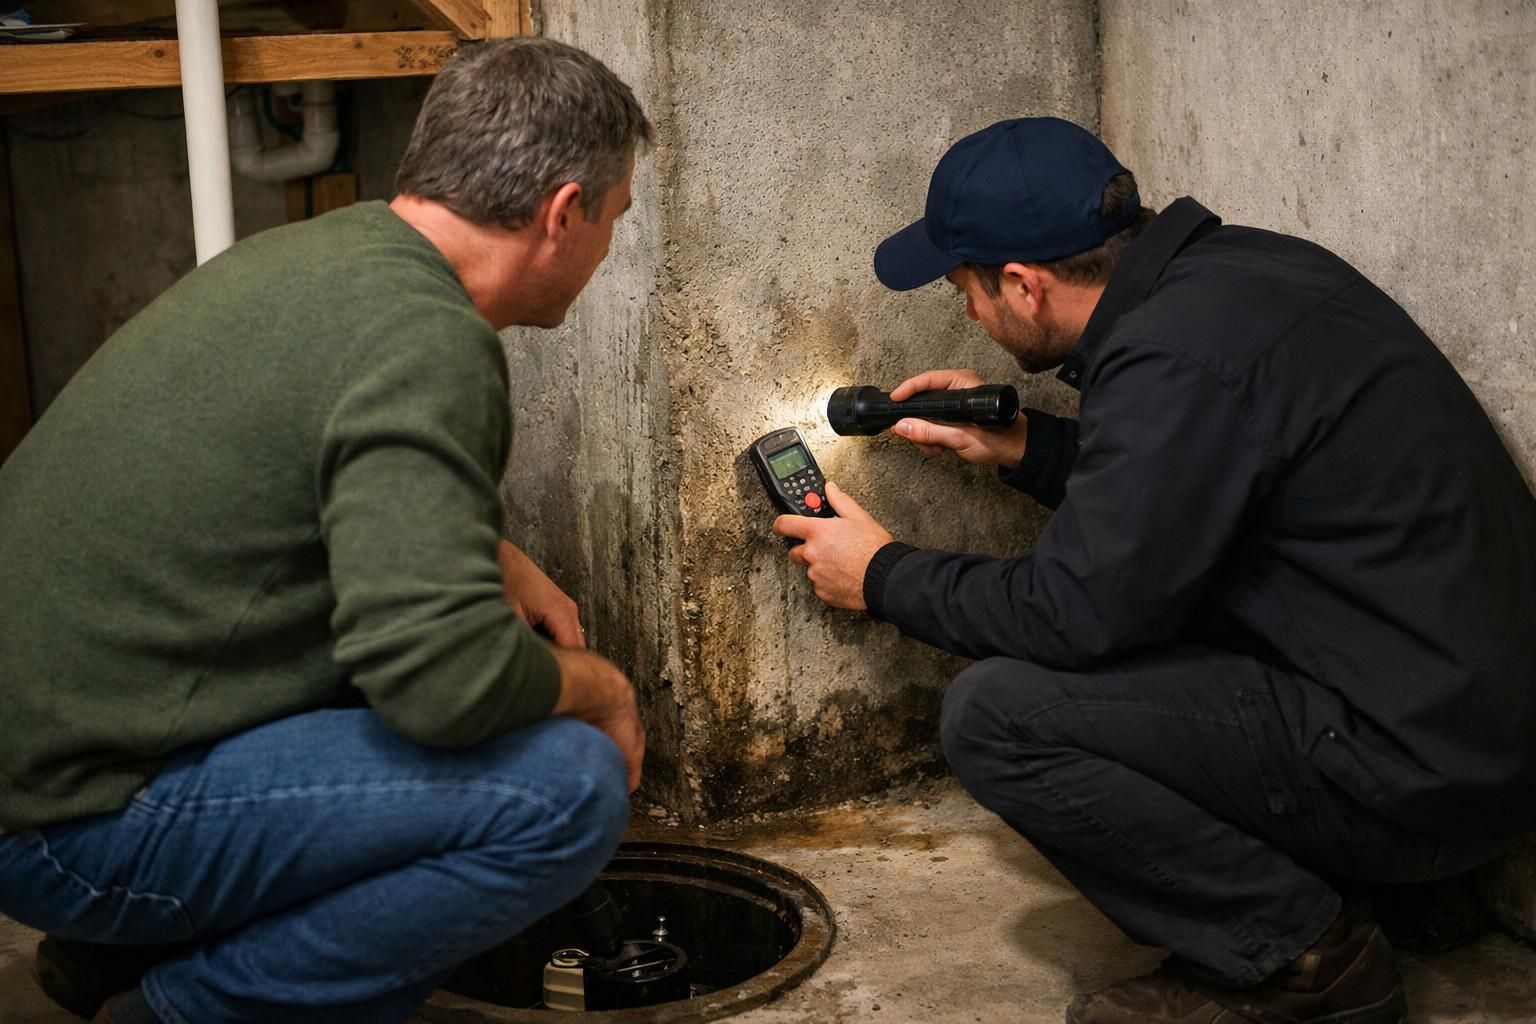
When to call a water damage restoration pro
Some situations are beyond DIY. Call a water damage restoration professional when water has soaked into multiple rooms, when ceilings or walls are involved, or when you cannot dry the area quickly with household equipment. Also call if the water may be contaminated, if you see signs of ongoing moisture after several drying cycles, or if you have hardwood, laminate, or layered flooring that can trap water.
Some situations are beyond DIY. Call a water damage restoration professional when water has soaked into multiple rooms, when ceilings or walls are involved, or when you cannot dry the area quickly with household equipment for effective water damage restoration. Also call if the water may be contaminated, if you see signs of ongoing moisture after several drying cycles, or if you have hardwood, laminate, or layered flooring that can trap water.
Professionals bring commercial dehumidifiers, air movers, and moisture detection tools that help confirm drying in hard-to-reach areas. They can also guide safe removal of damaged materials and help prevent secondary issues. Even if you plan to manage the cleanup yourself, consider at least a quick assessment when the leak reached wall cavities, insulation, or a ceiling assembly, since those areas are easy to underestimate.
What to document for insurance and repairs

Documentation helps you recover costs and ensures repairs are done correctly. Start by photographing the affected areas from multiple angles before moving too much, then continue taking photos as you uncover damage. Include close-ups of the burst section if visible, damaged materials, and any water-stained ceilings or walls.
Write down a timeline: when you discovered the issue, what you shut off, and what steps you took for cleanup and drying. Keep receipts for rentals or supplies related to pipe burst cleanup. Also list damaged items and where they were located. If you speak with a plumber, building maintenance, or a restoration company, note names and what was recommended. Clear documentation reduces confusion and makes it easier to coordinate insurance, repairs, and next-step decisions.
Next steps: cleanup, repairs, and prevention,
After the immediate mess is controlled, focus on finishing cleanup and making durable repairs. Remove and discard porous materials that cannot be dried effectively if they are heavily saturated or contaminated, such as some insulation, padding, and damaged drywall sections. Clean hard surfaces with appropriate household cleaners, then keep drying until humidity and materials are stable. If odors persist, it often indicates moisture remains somewhere, so return to checking baseboards, flooring edges, and adjacent rooms.
For repairs, a licensed plumber should address the cause and replace the failed section properly. Common prevention steps include insulating exposed pipes, sealing drafts near plumbing runs, maintaining consistent indoor heat in cold seasons, and learning where shutoff valves are. If you experienced freezing, consider adding freeze protection measures and checking other vulnerable sections. A good long-term habit is a periodic quick check under sinks, around water heaters, and near washing machine hoses so small leaks do not become emergencies.
Conclusion
Knowing what to do after a burst pipe comes down to three priorities: stop the water, stay safe, and dry thoroughly. Once the immediate flow is controlled, remove standing water, protect belongings, and start drying with strong air movement and dehumidification. Then look for hidden moisture in walls, floors, and ceilings, because that is where problems often linger. If the affected area is large, involves contaminated water, or you cannot dry it quickly, bring in a qualified restoration professional and a plumber. As a next step, locate and label your shutoff valves and address the root cause so you are better prepared if it happens again.
Knowing what to do after a burst pipe comes down to three priorities: stop the water, stay safe, and dry thoroughly. Once the immediate flow is controlled, remove standing water, protect belongings, and start drying with strong air movement and dehumidification. Then look for hidden moisture in walls, floors, and ceilings, as detailed in what to do after a water leak in wall, because that is where problems often linger. If the affected area is large, involves contaminated water, or you cannot dry it quickly, bring in a qualified restoration professional and a plumber. As a next step, locate and label your shutoff valves and address the root cause so you are better prepared if it happens again.