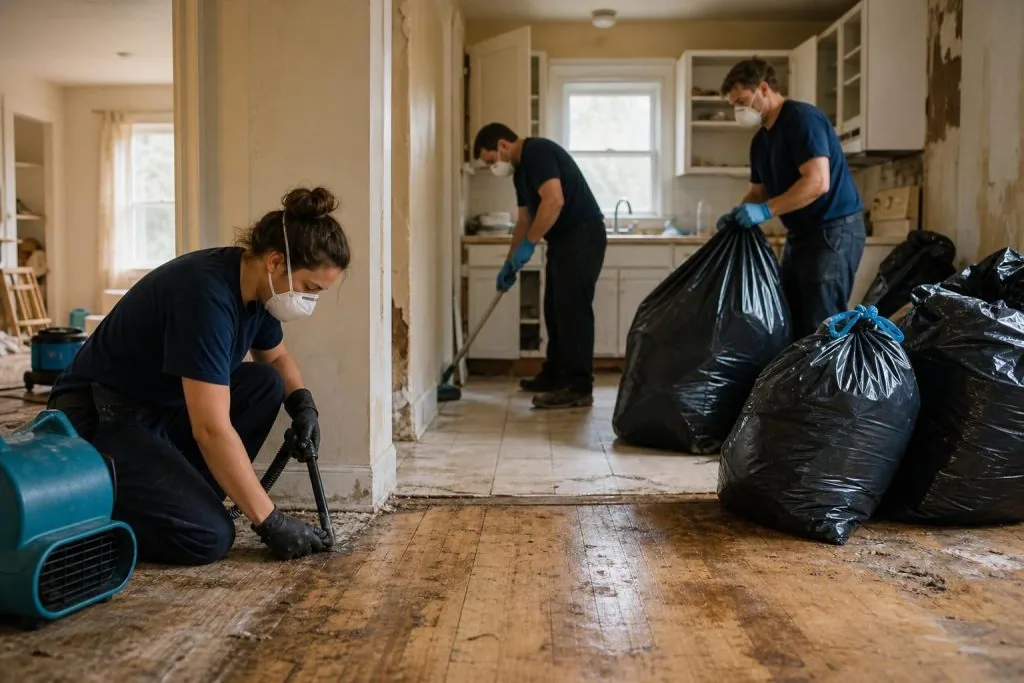


Storms don’t just leave puddles outside. They can push water through tiny building gaps fast, and once it’s inside, damage compounds by the hour. This guide to storm water intrusion cleanup focuses on the first decisions that actually change the outcome: how to stay safe, stop active entry, remove water without spreading it, and dry the structure in a way that doesn’t trap moisture in walls or under floors. You’ll also learn how to spot hidden wet areas, when “dry in place” is realistic, and when it’s smarter to bring in a restoration crew, especially around Seattle WA and Burien WA where wind-driven rain is common.
Best for: Homeowners dealing with fresh storm leaks who can safely stop the source and start basic extraction and drying quickly.
Not ideal when: Water is rising, sewage may be involved, or ceilings and walls show sagging, cracking, or movement.
Good first step if: You can shut off power to affected areas, document damage, and stop storm water entering house at the main entry point.
Call a pro if: Water intrusion through walls persists after tarping and sealing, or you can’t get indoor humidity dropping within a day.
Quick Summary
- Shut off power to wet areas, then stop active entry before you focus on drying.
- Prioritize removing standing water and wet porous items to prevent rapid moisture spread.
- Track humidity and moisture, because surfaces can feel “dry” while framing stays soaked.
- Drying works best with controlled airflow and dehumidification, not just blasting heat.
- Check hidden zones like baseboards, insulation, and subfloors where water lingers longest.
Quick Steps to Take Immediately
In the first hour, aim for progress, not perfection. With wind driven rain water intrusion, water may keep feeding in after the storm as roof channels, siding seams, and saturated soil continue draining.
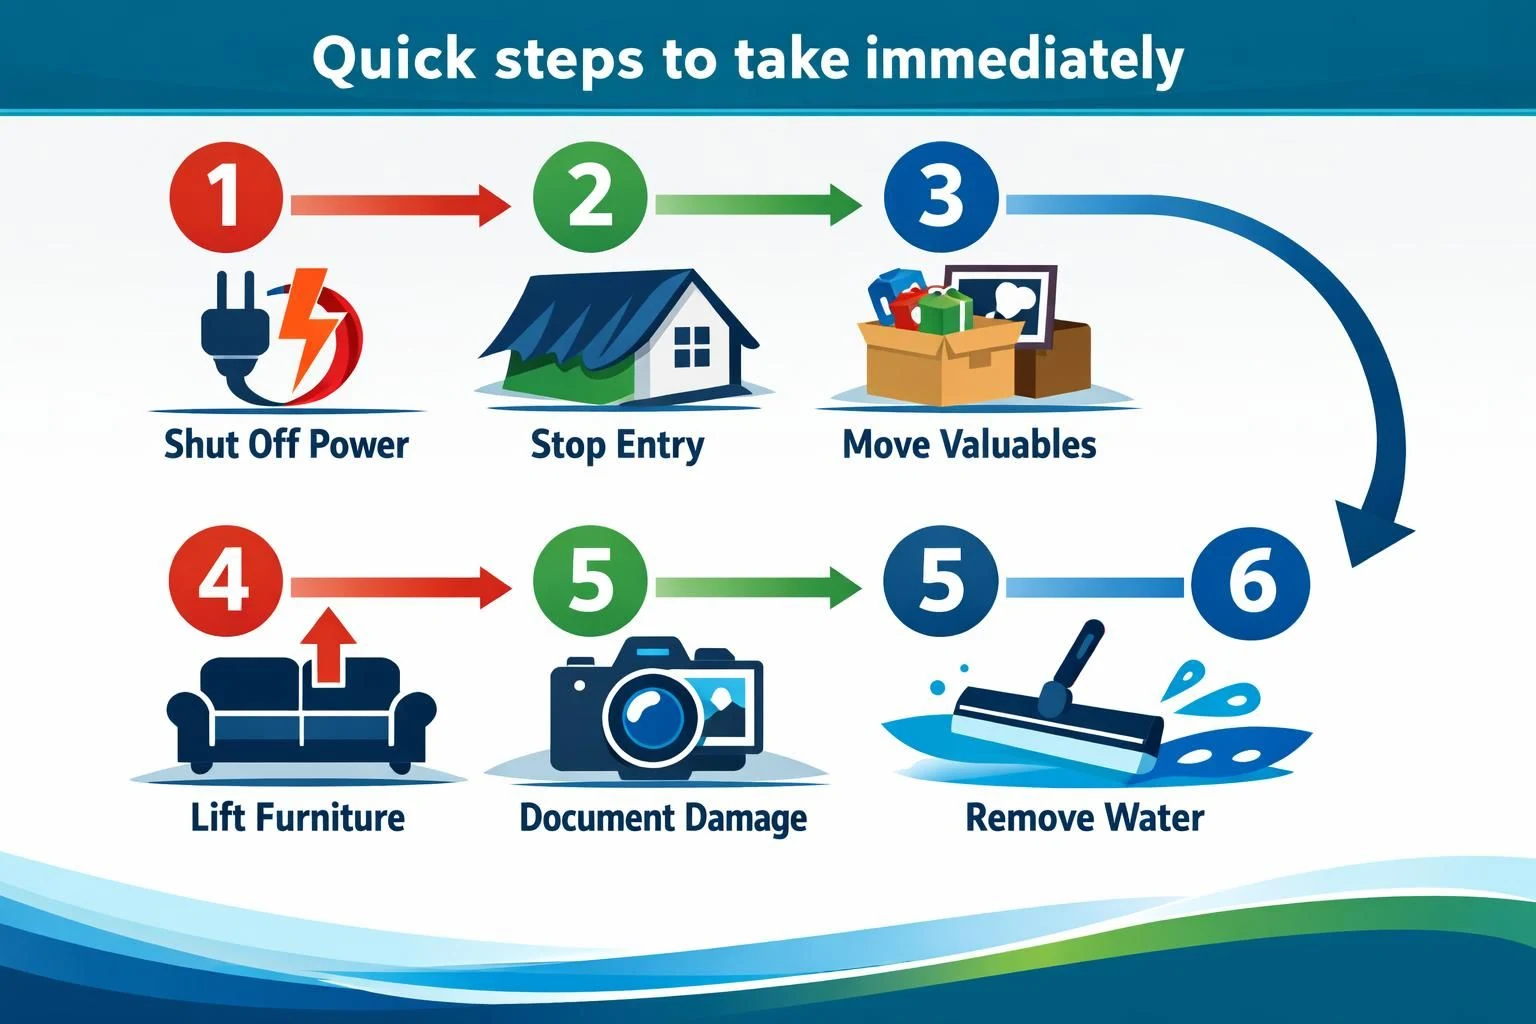
Use a simple order: stop entry, protect people, protect property, then document. This prevents you from cleaning while water is still moving through the structure.
Run this sequence:
- Shut off power to affected rooms at the breaker if outlets, cords, or appliances may be wet.
- Stop the inflow: tarp the roof, cover a broken window, or seal a door threshold with towels and tape.
- Move electronics and valuables to a dry room, and lift furniture legs on blocks or foil squares.
- Photograph and video damage before removing materials.
- Start water removal immediately, even if it’s a squeegee toward an exterior door.
If the source is an overflow or backup instead of storm entry, your priorities and safety steps can change. Use this quick reference: drain overflow first steps.
Safety First: Electricity
Assume electrical risk until you’ve shut off power and confirmed conditions are safe. Turn off breakers feeding the wet rooms before touching appliances, outlets, or wet flooring. Do not step into standing water to reach a panel.
If you can’t access the panel without crossing wet surfaces, don’t improvise. Wait for a qualified electrician or the utility to disconnect service. Keep extension cords, power strips, and chargers out of damp areas, and don’t run fans or dehumidifiers on circuits that may have gotten wet. Speed matters, but not more than preventing shock or fire.
Safety First: Electricity, Contaminated Water, and Structural Concerns
The safest assumption is that stormwater is both electrically hazardous and potentially contaminated. Even “clean” rain can pick up asphalt grit, soil bacteria, and animal waste, especially when storm water entering house happens at ground level.
Electricity is the most immediate danger. Don’t run cords across wet floors, don’t power equipment from damp outlets, and don’t attempt panel access through water. If you can’t shut power off safely, stop and get help.
Structural risk comes next because water adds weight and weakens building materials:
- Sagging ceilings, bulging plaster, or bowed walls can fail suddenly.
- Soft floor edges can signal saturated subflooring or stressed joists.
- A door that starts sticking after heavy rain may point to movement from soil pressure or shifting.
Contamination matters for cleanup decisions. If water is gray, oily, foul-smelling, or entered via a drain, treat it as dirty. Keep kids and pets away, wear gloves and boots, and bag porous items that contacted it. For a clearer view of how professionals handle categories, containment, and drying, see: restoration process overview.
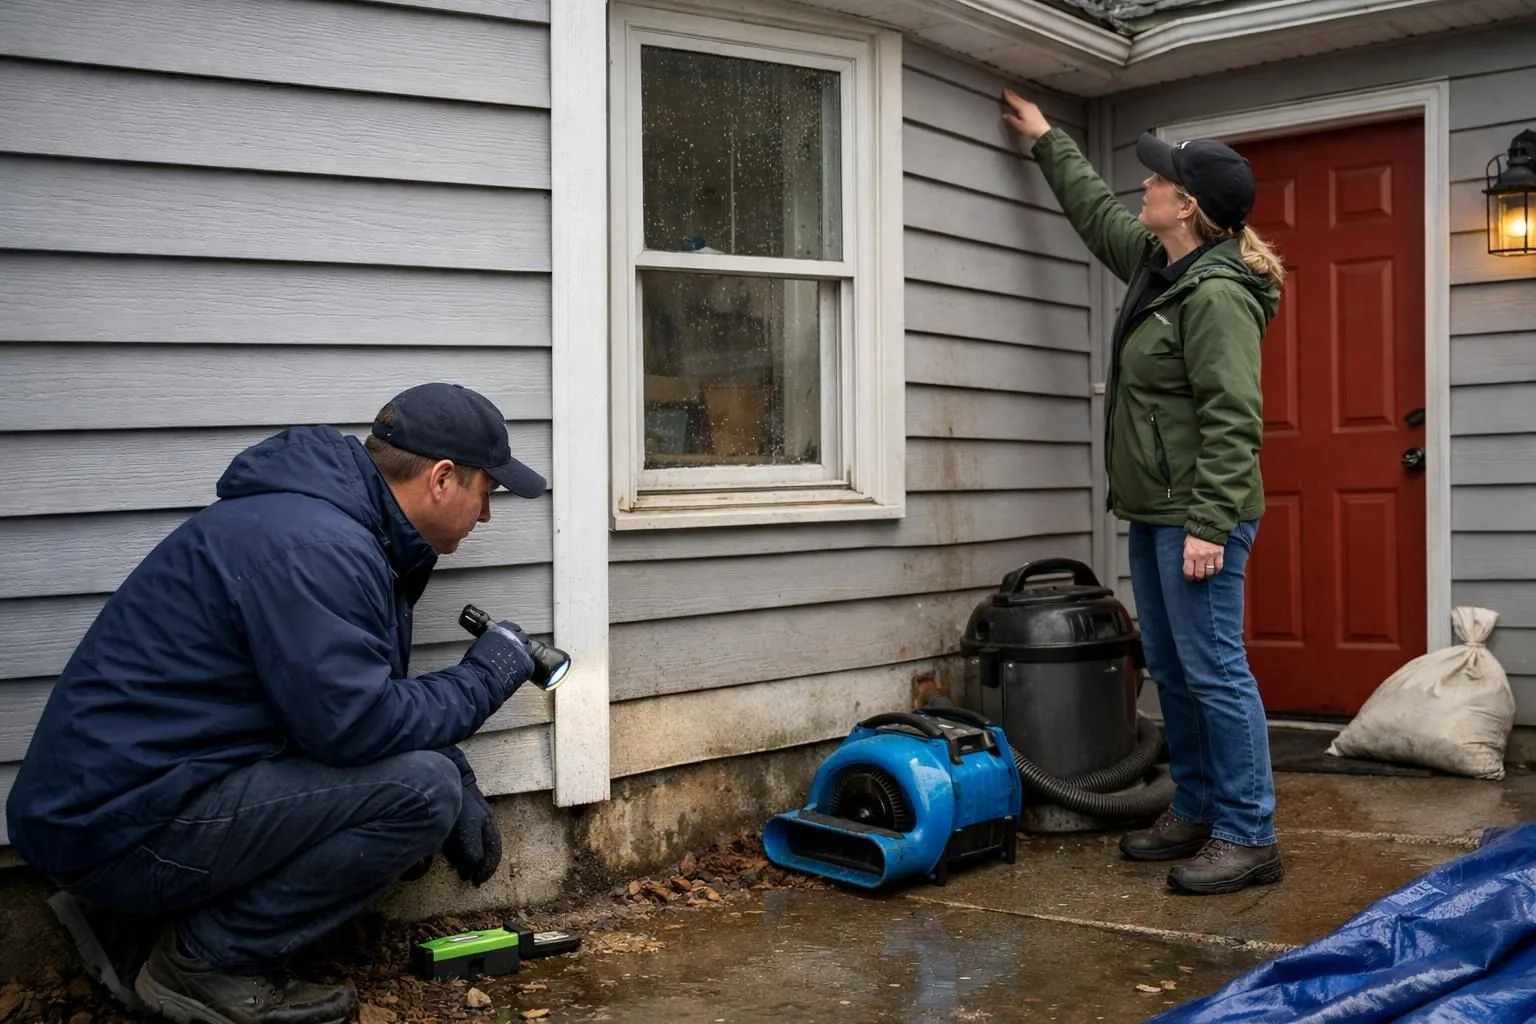
Identify the Entry Path (roof
Stopping the entry path reduces everything that follows: extraction time, drying time, and the chance of moisture hiding in cavities. Start by matching the indoor wet area to the nearest exterior feature, but remember water can travel along framing, flashing, and siding before it appears.
If you see ceiling staining, look up and outward first: roof edges, valleys, vents, and penetrations. For wet walls near openings, inspect windows, door thresholds, and siding seams for gaps, missing flashing, or failed sealant. For ground-level intrusion, look for pooling at the foundation, clogged downspouts dumping near the house, and cracks near slab edges. Even a temporary patch is worthwhile if it stops active inflow.
Identify the Entry Path (roof, Windows, Doors, Siding, Foundation)
The fastest way to cut damage is to find the pathway and stop it at the source, even temporarily. With wind driven rain water intrusion, the wettest indoor spot may be far from the opening because water can be pushed sideways and then run along framing.
Start “highest and closest,” then work outward:
- Ceiling drips or stains: check roof penetrations, flashing, valleys, and vents.
- Wet window trim: failed caulk, missing flashing tape, or wind pushing water past weatherstripping.
- Door threshold puddles: worn sweeps, poor stoop drainage, or water pooling against the sill.
- Wet exterior walls: damaged siding joints, clogged weep paths, or gaps at hose bibs and fixtures.
- Basement seepage: saturated soil, cracks, or water pushing under the slab edge.
Drying without stopping the pathway guarantees repeat damage the next rainfall. Temporary fixes are fine, but they must shed water correctly. A tarp has to be layered to drain off, and taped plastic should not funnel water into a wall cavity.
In Seattle WA and Burien WA, pay close attention to wind-facing walls and roof edges. Gust-driven rain can turn a small defect into sustained interior leakage.
Contain and Extract Standing Water
Remove standing water as soon as it’s safe. Even after rain stops, pooled water keeps feeding baseboards, drywall, and subfloors through wicking. The goal is to eliminate the reservoir, not just improve appearance.
Contain first, then extract. Use towels, rolled plastic, or door snakes to keep water out of adjacent rooms. Work from the wettest zone outward so you don’t spread moisture as you move.
Common extraction options:
- Wet/dry vacuum for shallow puddles on hard surfaces
- Pump for inches of water in a basement or garage
- Mops and squeegees to push water to an exit
- Professional extraction for wall-to-wall carpet and saturated pad
If water is under carpet, don’t “wait it out.” Padding holds water and keeps the subfloor wet. For urgent, high-volume removal support, see: urgent water extraction help.
Drying Strategy for Walls
Walls often stay wet inside the cavity even when surfaces feel dry. Start by improving airflow access: remove baseboards when practical, pull furniture away from exterior walls, and open interior doors to reduce stagnant zones.
Use a dehumidifier to keep indoor humidity low so moisture can migrate out of drywall and studs. Place fans to move air along wall surfaces and across floors, rather than blasting randomly into corners. If a wall was wet for hours, small inspection holes or selective drywall removal near the bottom may be necessary to release trapped moisture and reduce swelling, delamination, and odor.
Drying Strategy for Walls, Floors, and Contents
Drying works when you control evaporation and then remove that moisture from the air. Airflow alone can push moisture into cooler cavities, slowing drying and increasing mold risk.
First remove obvious wet items: area rugs, soaked cardboard, paper goods, and washable fabrics. Then set a drying zone:
- Open interior doors to balance airflow between rooms.
- Pull furniture slightly off exterior walls.
- Lift drapes and textiles off wet floors to prevent wicking.
For walls, determine whether insulation is wet. Painted drywall can look fine while the cavity remains soaked. Brief exposure caught quickly may allow dry-in-place. Hours of water running down inside a wall usually requires access points or selective removal to dry correctly.
For floors, focus on what’s underneath. Hardwood and engineered flooring can cup or buckle as moisture rises from below, even when the surface seems improved. For decision help specific to wood flooring, use: wood floor damage signs.
Fans and Dehumidifiers: What Works and What Backfires
Fans help when they move air across wet surfaces. Set them low and angled so air skims across floors and up along walls. For carpet you’re keeping temporarily, consistent surface airflow is more useful than blasting one spot.
Dehumidifiers do the heavy lifting. Put one in the wettest contained area and keep doors mostly closed so it dries a smaller volume of air. Empty the bucket often, or use a drain line if available.
What backfires:
- High heat without dehumidification, which drives moisture into cooler cavities
- Open windows during damp weather, which raises indoor humidity
- Box fans in contaminated-water situations, which can aerosolize particles and spread contaminants through the air.
How to Reduce Humidity Without Pulling More Rain Inside
During a storm, keep the building envelope closed and dehumidify mechanically. If outdoor air is damp, “airing out” can stall drying and keep materials wet longer.
If you’re short on dehumidification capacity:
- Run bathroom and kitchen exhaust fans if they vent outdoors.
- Close off unused rooms so you’re drying less air.
- Replace wet HVAC filters, and avoid running systems that may spread damp air through ducts.
If your HVAC has a dehumidify mode, it can assist, but it won’t replace dedicated drying when carpet, drywall, or insulation are saturated.
Hidden Moisture Checks (baseboards
Hidden moisture is what turns a one-time storm leak into musty odors and repeat damage. Start at baseboards and trim. Swelling, loose caulk, bubbling paint, and dark nail pops can signal water behind the wall.
Next, check likely insulation zones. Exterior-wall areas that stay cool and damp, plus crawlspace or attic edges, can show where water tracked. Finally, assess subfloors by walking slowly near perimeter walls and under windows for spongy areas, squeaks, or new softness. If you have a moisture meter, compare wet-zone readings to dry-zone walls to confirm real progress.
Hidden Moisture Checks (baseboards, Insulation, Subfloor)
Hidden moisture is why rainwater intrusion cleanup can look successful and then smell bad a week later. Water hides behind trim, under flooring, and inside insulation, and those areas dry last.
Check common traps:
- Swollen or cool baseboards, bubbling paint at the bottom edge
- Damp carpet edges after the center seems dry
- Staining or separation at door casing joints
- Spongy flooring near walls or beneath windows
A moisture meter helps, but you can also use simple checks: press along the bottom of drywall, smell near exterior corners and closets, and watch for fast-returning condensation. For a detailed list of warning signs, see: signs of hidden damage.
Subfloors need special attention. Moisture can sit between layers, especially under vinyl, laminate, or tile where the top surface blocks evaporation. If you suspect subfloor saturation, use: subfloor moisture red flags.
When Materials Should Be Removed vs Dried in Place
Remove materials when they can’t dry fast enough, can’t be cleaned safely, or will deform and fail even if they dry. Dry-in-place can work when exposure was brief, the water was clean rain, and you can confirm that airflow and dehumidification reach the wet layers.
Remove when you see:
- Swollen or crumbling drywall, especially with wet insulation
- Carpet padding that stayed wet for hours or smells off
- MDF baseboards that puffed or delaminated
- Saturated insulation that will hold moisture against framing
Dry in place can work when the wet area is limited, you can open trim or create access points, and you verify progress over time instead of relying on touch alone. If drywall is the main question, watch for softness, staining lines, and texture changes. For guidance, use: drywall water damage signs.
When to Call a Restoration Pro (and What They’ll Do)
Call a restoration pro when the affected area is large, drying stalls, or the water category is uncertain. The advantage isn’t only equipment. Pros map moisture, contain correctly, and make removal decisions that reduce trapped water and microbial growth.
A typical crew will:
- Assess safety risks and moisture spread beyond what you can see.
- Perform high-volume extraction and build controlled drying zones.
- Remove unsalvageable porous materials and document conditions.
- Monitor drying with moisture readings and adjust equipment.
Prevention for the Next Storm (gutters
Prevention starts with directing roof runoff and ground drainage so water never builds against vulnerable details. Clean gutters and confirm downspouts discharge well away from the foundation, not into saturated beds or blocked splash blocks.
Walk the perimeter to improve grading so soil slopes away, and fix areas where water ponds near thresholds or basement walls. Reseal only after water movement is addressed: replace worn weatherstripping, repair flashing at windows and roof penetrations, and keep siding joints and penetrations tight. The goal is to shed water outward, quickly, without feeding wall assemblies.
Prevention for the Next Storm (gutters, Grading, Sealing)
The best prevention is consistent maintenance: move water away fast and close the easy entry points that wind-driven rain exploits. After drying out, walk the exterior during the next light rain to spot flow paths and splash zones.
Prioritize:
- Gutters and downspouts: keep clear and discharge away from the foundation.
- Grading: slope soil away so water doesn’t sit against the house.
- Window and door details: maintain caulk, but verify flashing and weep paths.
- Siding penetrations: seal around pipes, vents, and fixtures with exterior-rated materials.
- Roof transitions: maintain flashing at valleys, chimneys, and skylights.
If basement seepage is recurring, you may need more than spot sealing. For scope and options, see: basement waterproofing overview.
Conclusion
The right storm water intrusion cleanup plan is simple in theory: stop the entry path, remove standing water, then dry the structure in a controlled way while you check for hidden moisture. In practice, the details matter, especially with wind-driven rain and wall cavities that trap water. Your next step is to pick one measurable goal for the next 24 hours: no active inflow, no standing water, and steadily dropping indoor humidity. If you can’t hit that, or you’re seeing soft floors or stained walls spreading, it’s time to bring in a restoration pro.