Water damage under tile floor is sneaky because tile and grout can hide a lot before anything looks “wrong.” By the time you notice loose tiles or a musty smell, the real issue may already be in the subfloor or wall cavities. The good news is you can do a few smart things right away to limit spread, protect nearby rooms, and figure out whether you’re dealing with a minor surface problem or a wet subfloor under tile that needs targeted drying. Below you’ll get a practical, step-by-step plan, plus the key signs that tell you when tile has to come up.
Best for: Homeowners who see moisture, odors, or loosening tiles and need a clear first-day plan to limit damage.
Not ideal when: You have sewage backup, widespread flooding, or water is actively rising from below the tile surface.
Good first step if: You can safely shut off water, document what you see, and start controlled extraction and airflow fast.
Call a pro if: Moisture spreads beyond one area, you suspect a pan or flange failure, or the subfloor feels soft or spongy.
Quick Summary
- Shut off the water source and stop new water first, then deal with what’s already there.
- Don’t assume grout “sealed it”; water can travel along edges, cracks, and fastener penetrations.
- Look for water under tile signs like hollow sounds, dark grout lines, and persistent musty odor.
- Verify moisture with targeted checks (meter readings and small inspection points) instead of guessing.
- Drying needs containment and airflow control; sometimes tile can stay, sometimes it can’t.
- If the subfloor is compromised or the leak path is unclear, bring in a restoration pro early.
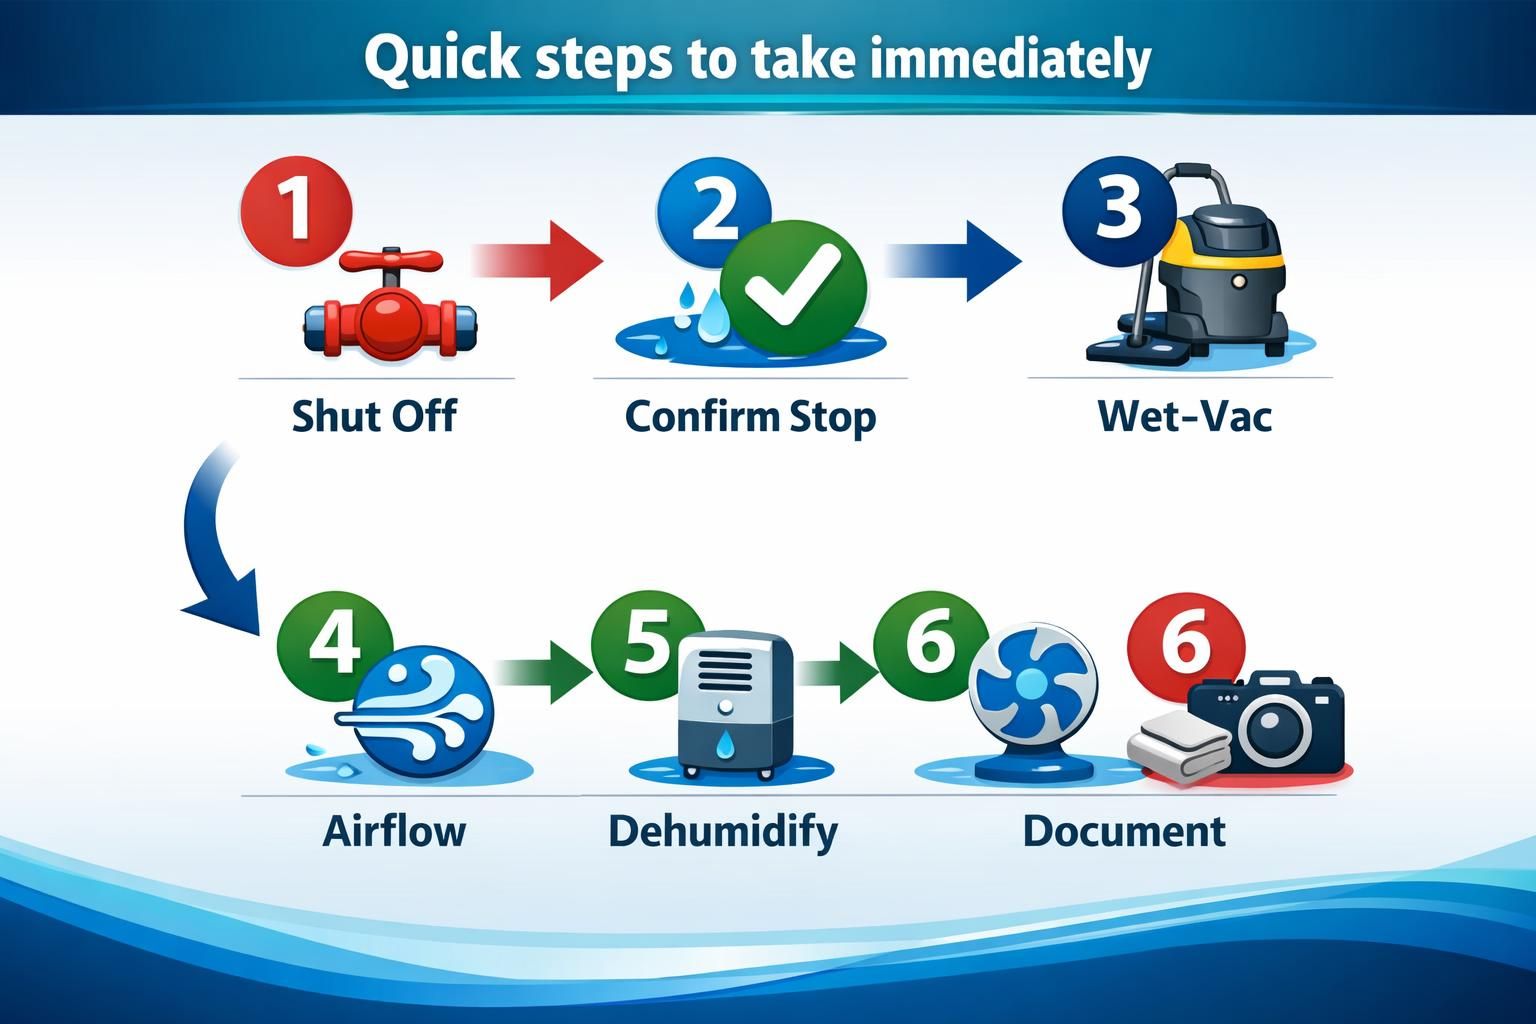
Quick Steps to Take Immediately
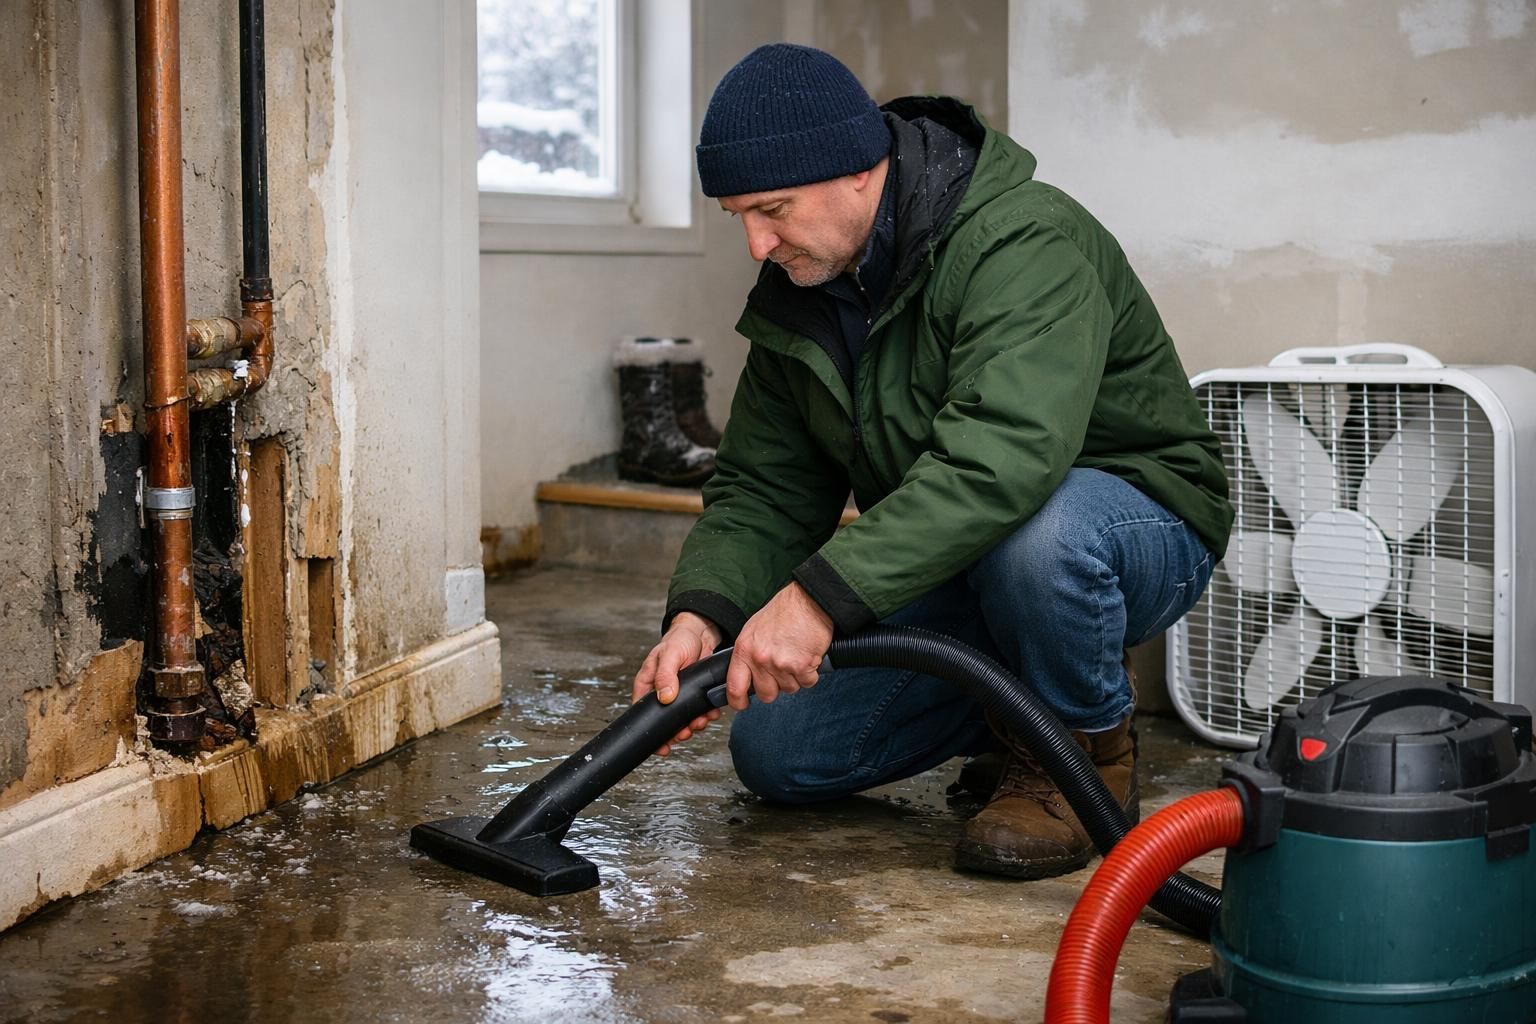
Stop new water, remove what you can, and drop humidity fast. Shut off fixture stops, or the main if you can’t isolate it, and stop using the shower/tub until you know the source. Clear the area: remove rugs, lift items off the floor, and expose the toilet base, tub edge, and vanity toe-kick. Take photos first. Wet-vac or mop standing water, run fans across the floor, and use the exhaust fan and a dehumidifier if available. Check for a running toilet or supply drips. Contain spread at thresholds with towels. More steps: how to stop spread.
How Water Gets Under Tile (grout
Water gets under tile through small gaps and weak transitions, then spreads by capillary action and gravity. Common entry points include cracked grout, failing caulk at corners and tub-to-tile joints, and openings at penetrations like toilet bolts, supply lines, and shower trim. “Sealed” grout still passes moisture over time.
How Water Gets Under Tile (grout, Plumbing, Flange, Pan Failures)
Signs of Water Damage Under Tile Floor
Water damage under tile often shows up in feel, smell, and sound even when the surface looks fine. Watch for tile that feels cool, hollow, or spongy, grout that stays dark, and new gaps at edges or around penetrations. Check low points, the toilet base, tub/shower edges, and room perimeters, plus adjacent rooms where water may travel along seams or joists. Patterns help: worse after showers suggests pan or edge failures, worse after flushing points to the flange, and constant dampness suggests a supply or hidden leak. More clues: signs of hidden damage.
Loose Tile
Loose tile is one of the most actionable indicators of water damage under tile floor because it often means the bond coat or underlayment has been weakened by moisture. If a tile rocks under foot or sounds hollow compared to surrounding tiles, water may be trapped below and the thinset may be failing. Mark the area, avoid using the bathroom if the source is unknown, and monitor whether the “loose zone” grows over 24–48 hours. Expanding looseness usually points to ongoing moisture movement, not a one-time surface spill.
Loose Tile, Hollow Sounds, Dark Grout, and Musty Odor
Loose or rocking tiles often mean the bond layer or underlayment is moisture-damaged. Tap with a knuckle; a hollow sound versus surrounding tile suggests debonding or saturated material.
Grout that stays dark after the room dries can indicate moisture feeding from below. A musty odor that returns soon after ventilation signals sustained dampness in a trapped cavity, not normal “bathroom smells.”
Staining at Baseboards and Adjacent Rooms
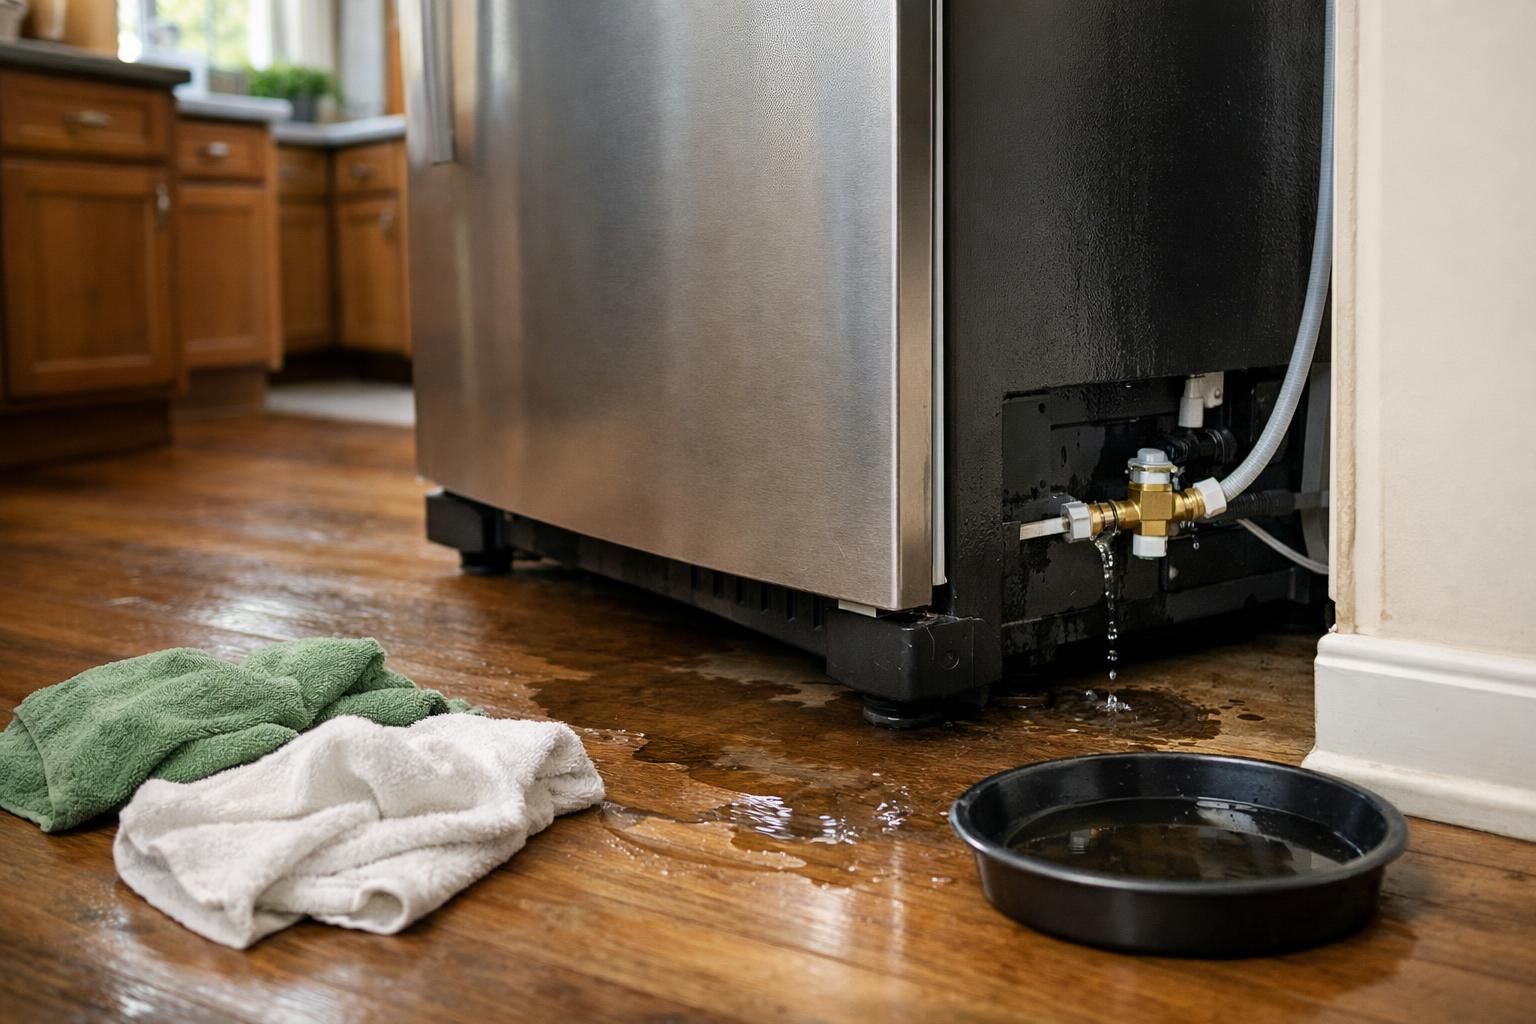
Staining or swelling at baseboards usually means water is wicking up from the floor assembly. In bathrooms, this often points to a leaking toilet seal, failed tub or shower caulk, or moisture getting past the waterproofing and migrating into adjacent rooms.
Stop the Source and Extract Surface Water
Stop the water before drying. If you can’t identify the source quickly, stop using the suspected fixtures and shut off the local supply, or the main if needed. Extract reachable water with a wet/dry vacuum, working slowly along grout lines and low spots near the toilet base, tub edge, and vanity toe-kick. Don’t rush heat; control humidity with ventilation and dehumidification and aim fans across the surface to move moist air out. If water hit drywall or cabinetry, open safe access points for airflow. For overflows or backups, follow clogged drain overflow steps.
How to Check if the Subfloor is Wet (without Guesswork)
Confirm a wet subfloor by mapping moisture, then verifying at one clean access point. Start with clues: cool spots, slight “give,” or grout lines that stay darker. Use a moisture meter to find the highest zone; pinless meters compare areas over tile, while pin meters work best on exposed wood at an edge or from below. Verify from a basement, crawlspace, or access panel by checking for staining, darkened wood, damp insulation, or corroded fasteners. If you can’t access below, pull a small baseboard or toe-kick to inspect the subfloor edge. Repair context: water damaged subfloor.
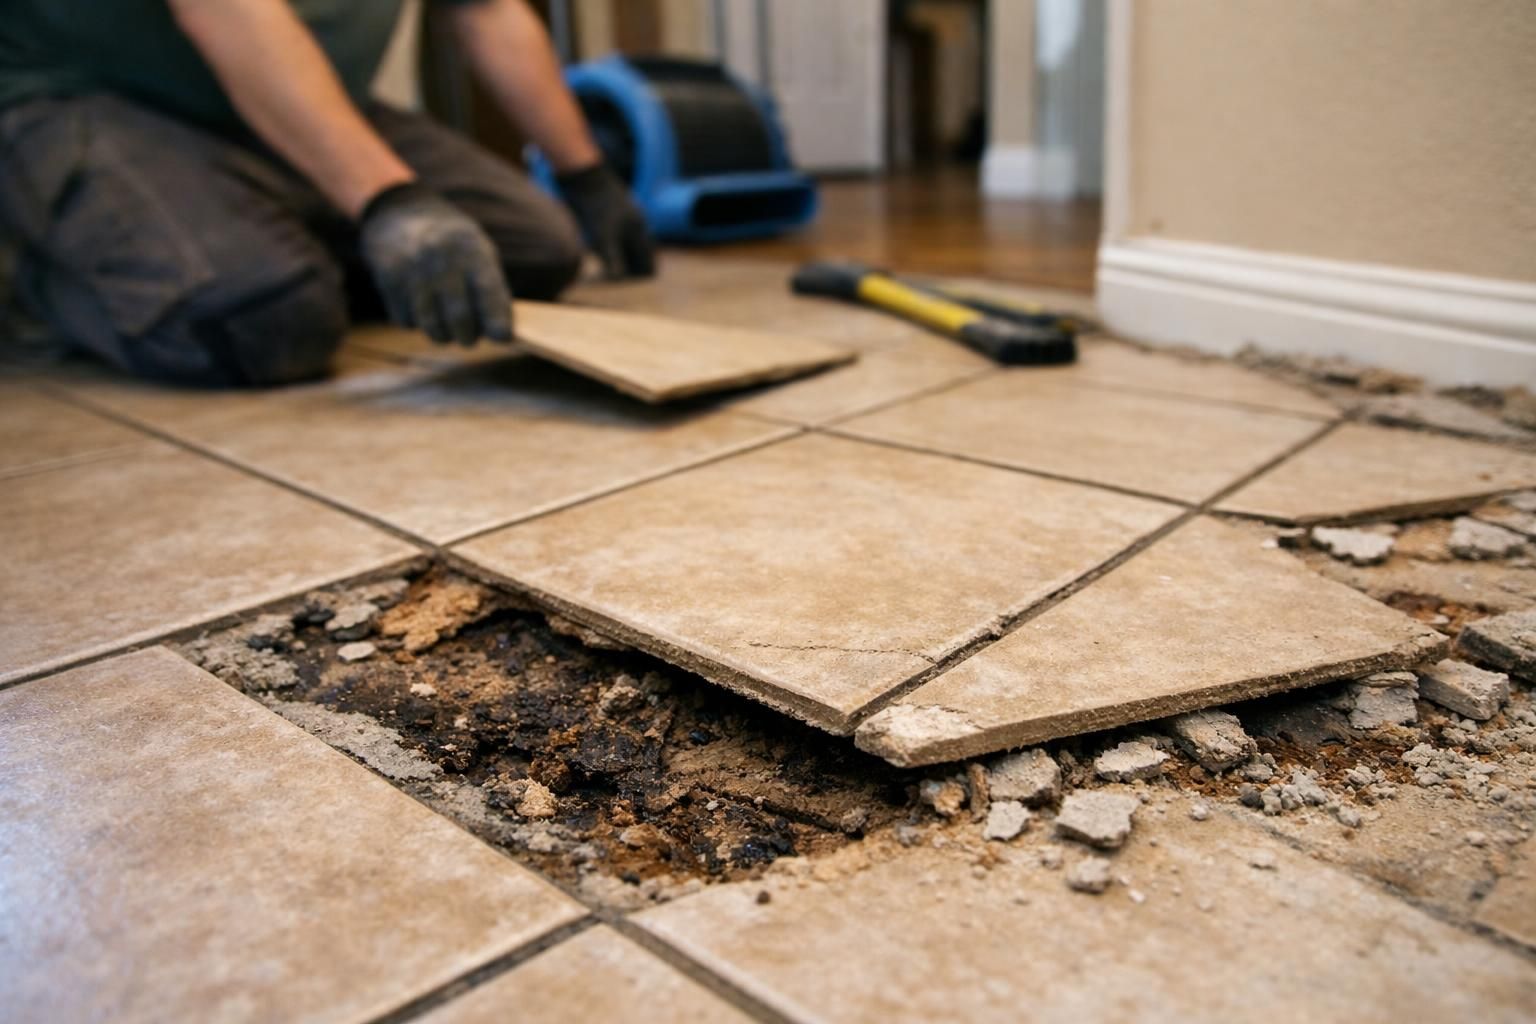
Drying Strategy and When Tile Needs to Come up
Drying must pull moisture from trapped layers without pushing it into walls. If the leak was brief, the source is stopped, and moisture is superficial, you may dry in place with airflow and dehumidification. Tile usually needs removal when water is trapped in a mortar bed, underlayment is swelling, or tiles are losing bond. Plan removal if tiles are loose or tenting, readings don’t drop over 48–72 hours, the subfloor feels soft or swollen, musty odor persists, or water migrated under walls. Document what you find and note the underlayment type, since cement board, plywood, and foam systems hold and release moisture differently.
When to Call a Restoration Pro (and What They’ll Test)
Call a restoration pro when moisture is likely in concealed layers, contamination is possible, or the wet area is spreading beyond what you can dry. They map moisture across the tile and at edges, then check baseboards and drywall. Thermal imaging may show patterns, but meters confirm conditions. If there’s access, they inspect from below for staining and saturation. Their workflow often follows restoration process steps, including containment, small openings, and which materials may delaminate. If water may be contaminated or electrical safety is in question, don’t wait.
Preventing Repeat Bathroom Floor Leaks
Prevent repeat leaks by maintaining movement joints, penetrations, and anything that flexes. Re-caulk change-of-plane joints at shower corners, tub-to-tile transitions, and trim edges using bathroom-rated sealant, and don’t grout joints that should move. Stop fixture movement: a rocking toilet ruins the flange seal, so shim, tighten, and re-seat it as needed. Under sinks, secure supply lines and traps and avoid bumping connections with stored items. Reseal porous grout, but don’t treat sealer as waterproofing. Fix slow drips fast, run the exhaust fan during and after showers, and inspect the toilet base and tub/shower edges for gaps or staining after any incident.
Conclusion
Water damage under tile floor is manageable when you move in the right order: stop the source, extract what you can, confirm whether the subfloor is wet, then choose a drying plan based on evidence, not hope. If your signs point to trapped moisture, loose tiles, or spreading staining, don’t keep “airing it out” and expecting a different result. Take targeted inspection steps, and bring in a restoration pro when concealed layers are involved. Your next practical move is simple: isolate the bathroom from use, map the wet area, and confirm what’s happening under the tile before damage expands.