Wood floor water damage can go from a small cosmetic headache to a full flooring failure faster than most people expect, especially if moisture slips under the boards. The tricky part is that hardwood floor problems often show up in stages: first a little discoloration, then warping, then loose floorboards or soft boards that feel wrong underfoot. In this guide, you’ll learn what to look for, what to do in the first hour, how to judge severity (including subfloor risk), and how to fix water damaged wood floor areas with the right repair or replacement approach.
Best for: Homeowners who caught a spill, appliance leak, or toilet overflow early and want to act before warping spreads.
Not ideal when: The water is contaminated, the floor is buckling, or you suspect water intrusion reached the subfloor.
Good first step if: You can stop the source, remove standing water, and start controlled drying with fans and a dehumidifier.
Call a pro if: You smell mildew, see mold, find soft boards, or the wet area keeps growing after 24 to 48 hours.
Quick Summary
-
Early damage usually shows as subtle cupping, dull finish, or slight discoloration before boards move dramatically.
-
Severe damage often includes buckling, swelling, gaps, and loose floorboards that don’t sit flat.
-
The safest first moves are stopping the source, extracting water, and drying with airflow plus dehumidification.
-
Assessing the subfloor matters because trapped moisture can cause structural damage and recurring odor.
-
Repairs range from drying and refinishing to targeted board replacement when planks won’t return to shape.
What Wood Floor Water Damage Looks Like (Early Vs. Severe)
Early signs include cloudy finish, light discoloration, and slight edge lift. Severe damage shows pronounced swelling, warping, shifting gaps, and sections that rise or feel springy. The longer moisture remains, the more likely it becomes a remove-boards-and-inspect situation instead of a simple sand-and-refinish repair.
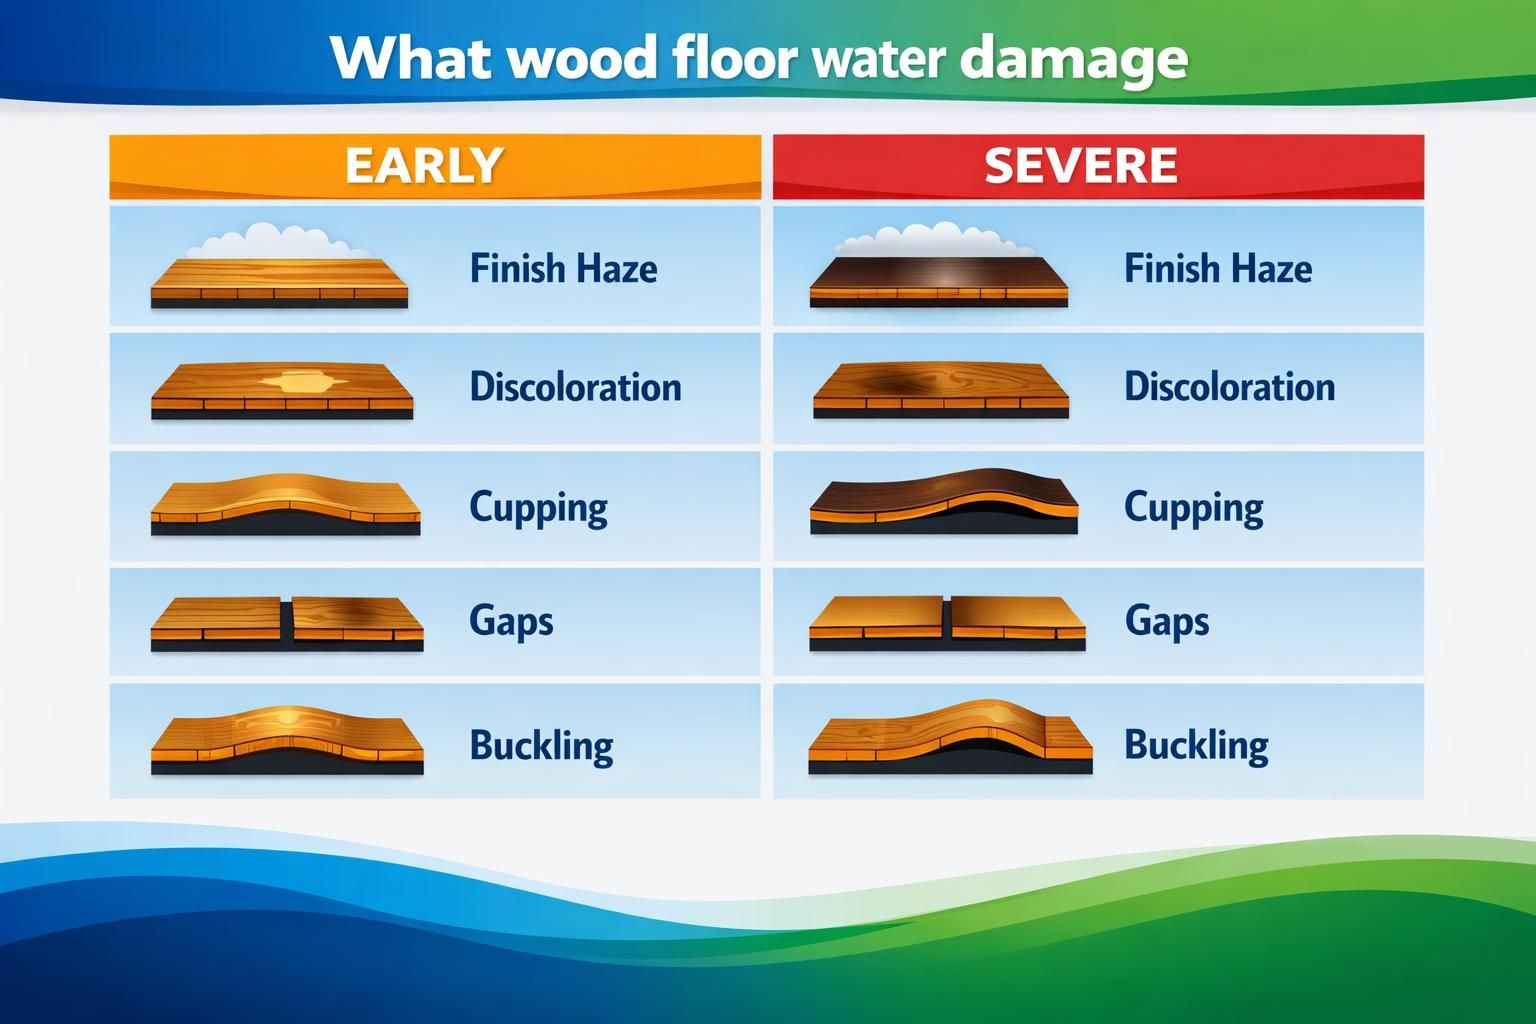
Common Visual and Smell Clues
Look for discoloration, dark staining along seams, white haze in the finish, and soft boards near the leak point. Your nose helps too: a persistent musty odor, mildew smell, or “wet wood” scent often means moisture is trapped below the surface and drying isn’t complete.
Cupping Vs. Crowning Vs. Buckling (Quick Definitions)
Cupping: edges rise, center dips, usually from moisture below. Crowning: center rises, often after surface wetting or sanding too early. Buckling: boards lift off the subfloor in peaks.
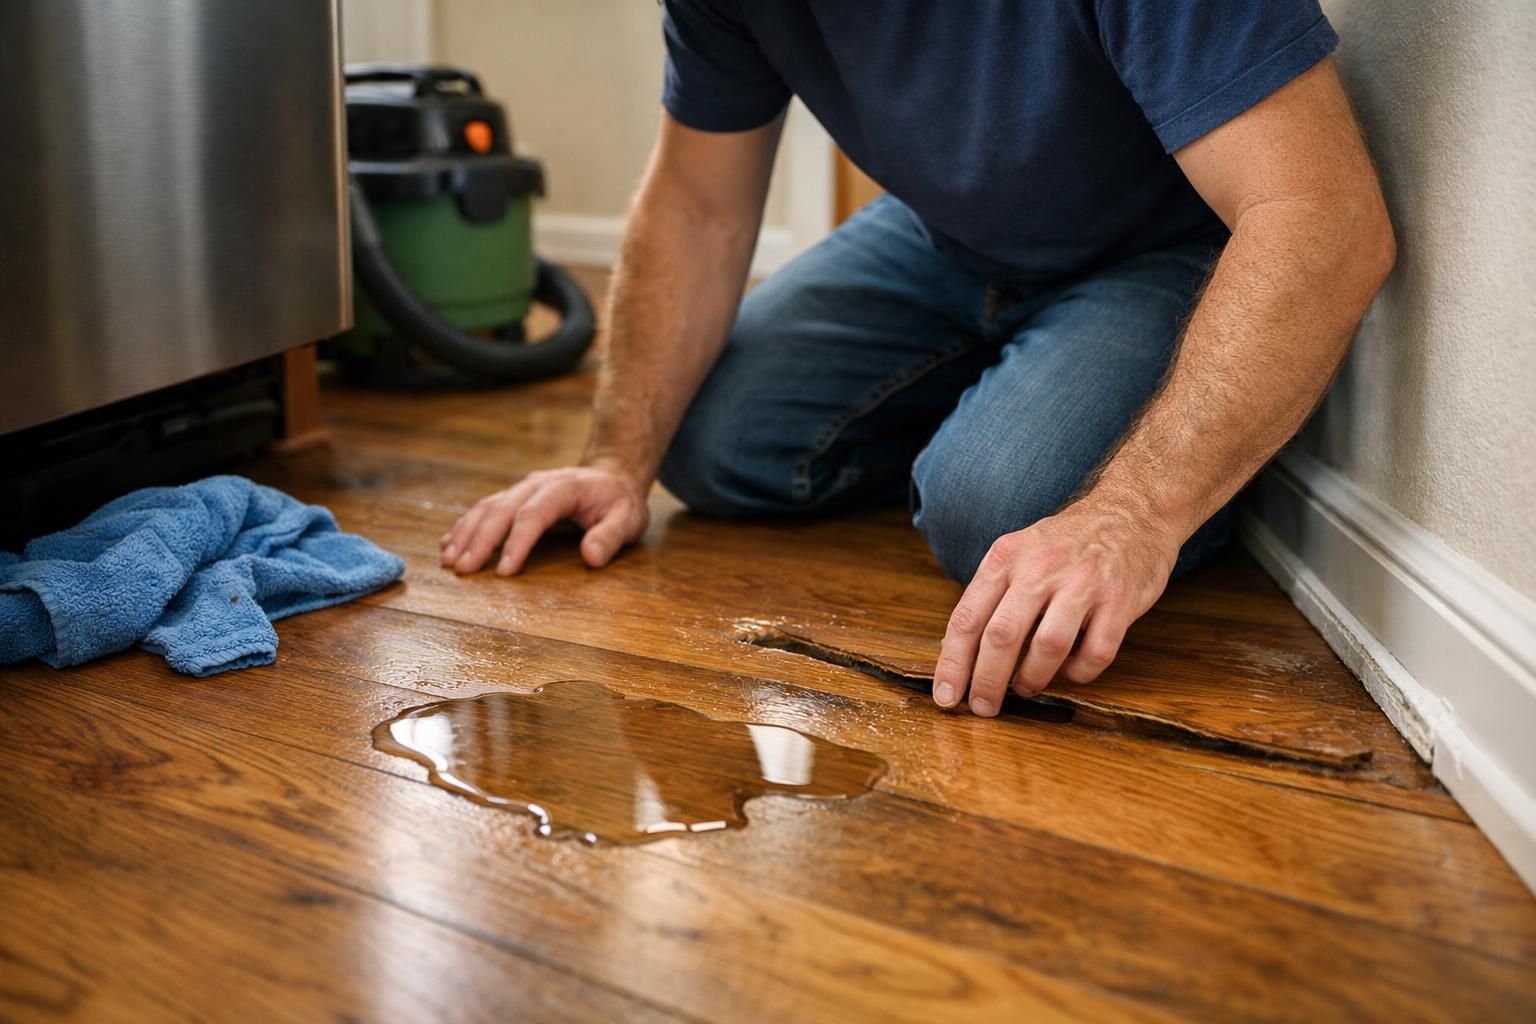
First Steps: What to Do Immediately After a Spill or Leak
Act fast: stop the source, remove standing water, and begin gentle drying. Water can travel under boards even from small leaks. If electricity may be involved, handle safety first; see shutoffs after a leak. Remove rugs and furniture so airflow reaches the wet area.
Stop the Source, Remove Water, Start Drying Safely
Stop the source, then extract water with towels or a wet vacuum if safe. Start drying with fans moving air across the surface, run a dehumidifier, and open interior doors for ventilation.
What Not to Do (Steam, Heat, Walking on Wet Boards)
Don’t steam clean; it drives moisture deeper. Avoid high heat close to the floor, which can worsen warping. Minimize walking on wet boards to prevent finish abrasion and seam stress.
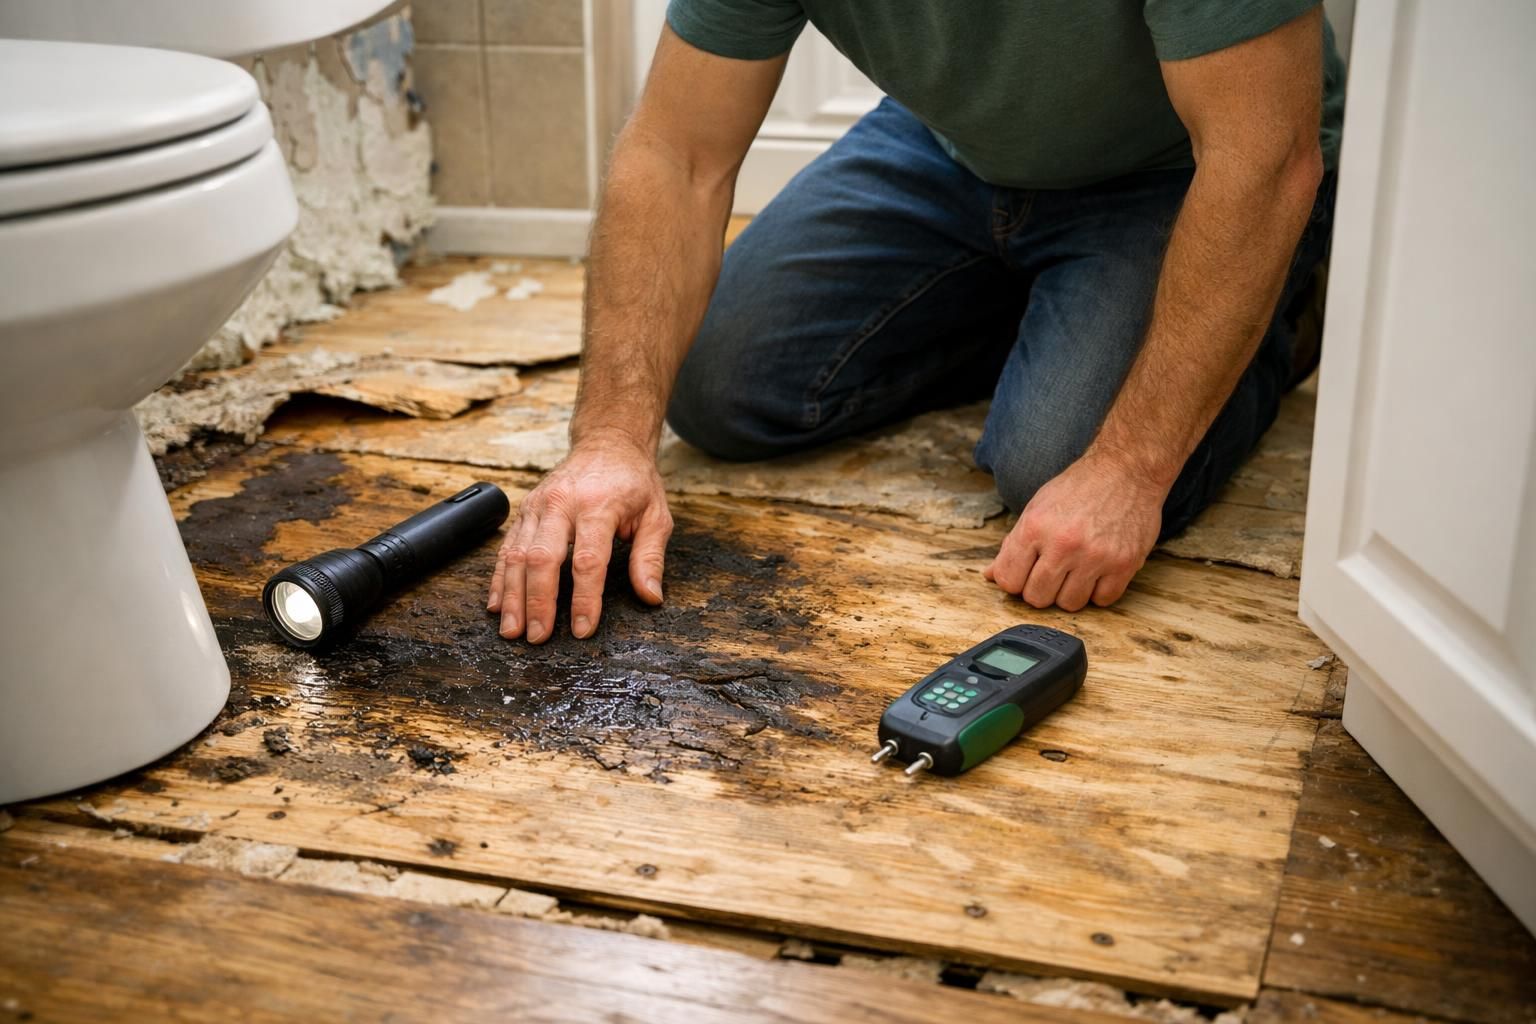
How to Assess the Severity (and Whether the Subfloor is Affected)
Assess where water went, how long it sat, and whether the floor feels stable. Spills may stay surface-level, but slow leaks and flooding can travel through seams into the subfloor. If the wet area expands, water is moving underneath. Softness, looseness, or bounce suggests adhesive, fastener, or structural issues below.
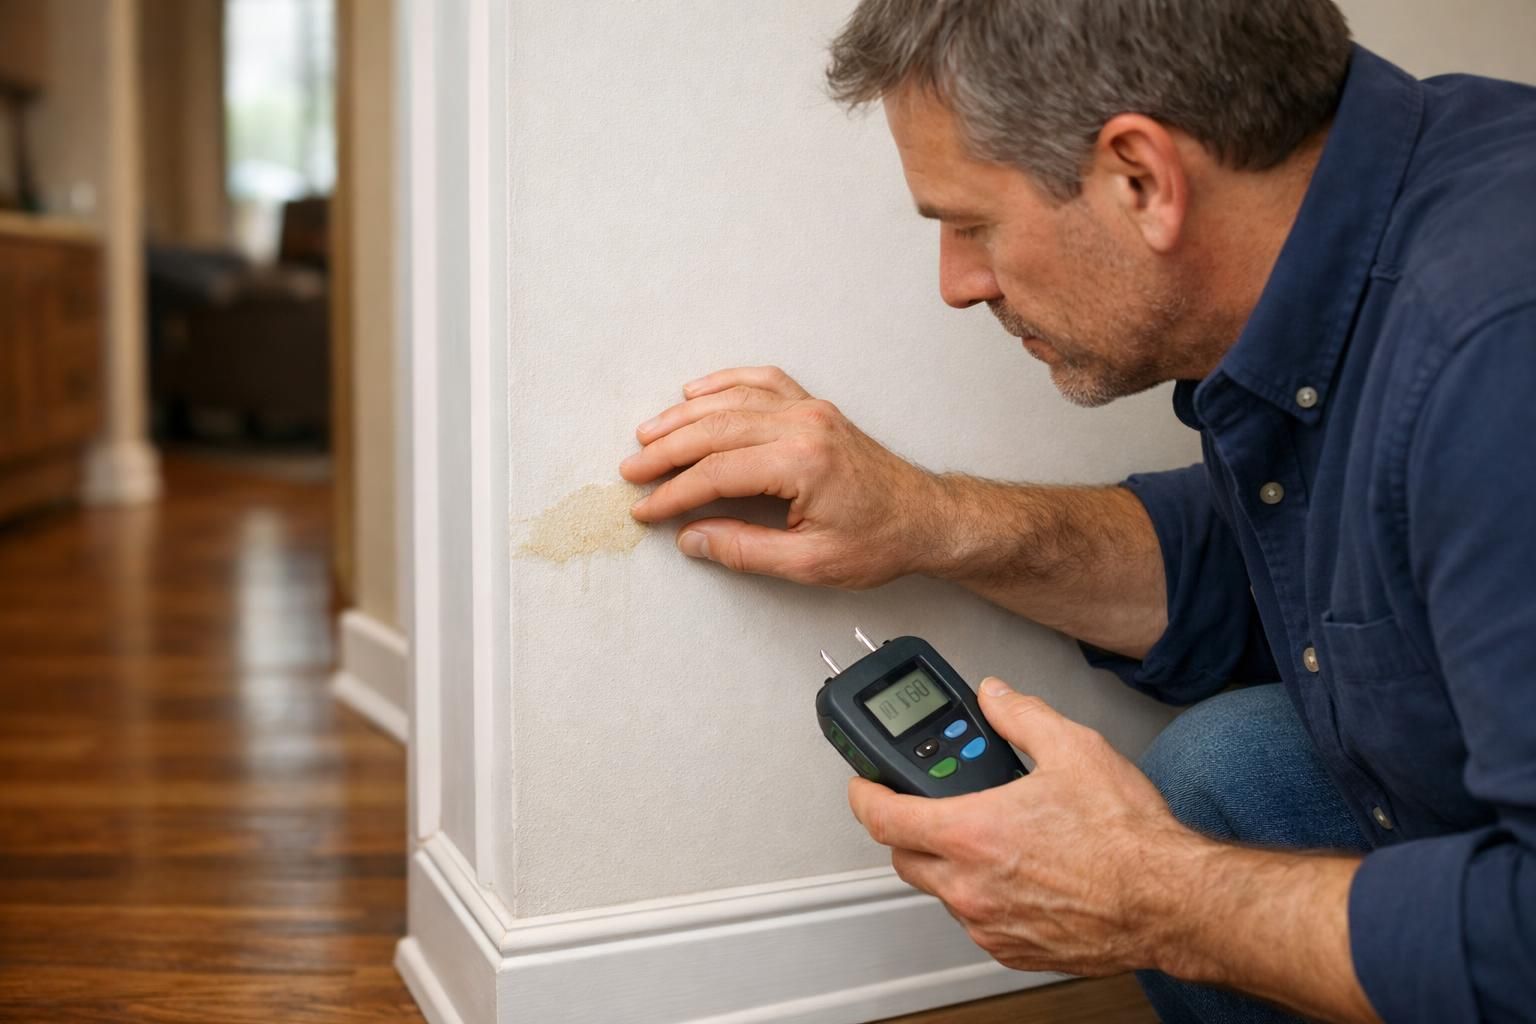
Simple DIY Checks Vs. When You Need Moisture Readings
DIY checks: feel for sponginess, look for raised edges, and inspect nearby thresholds for new cupping. If the floor changes daily, get moisture readings in wood and subfloor before refinishing.
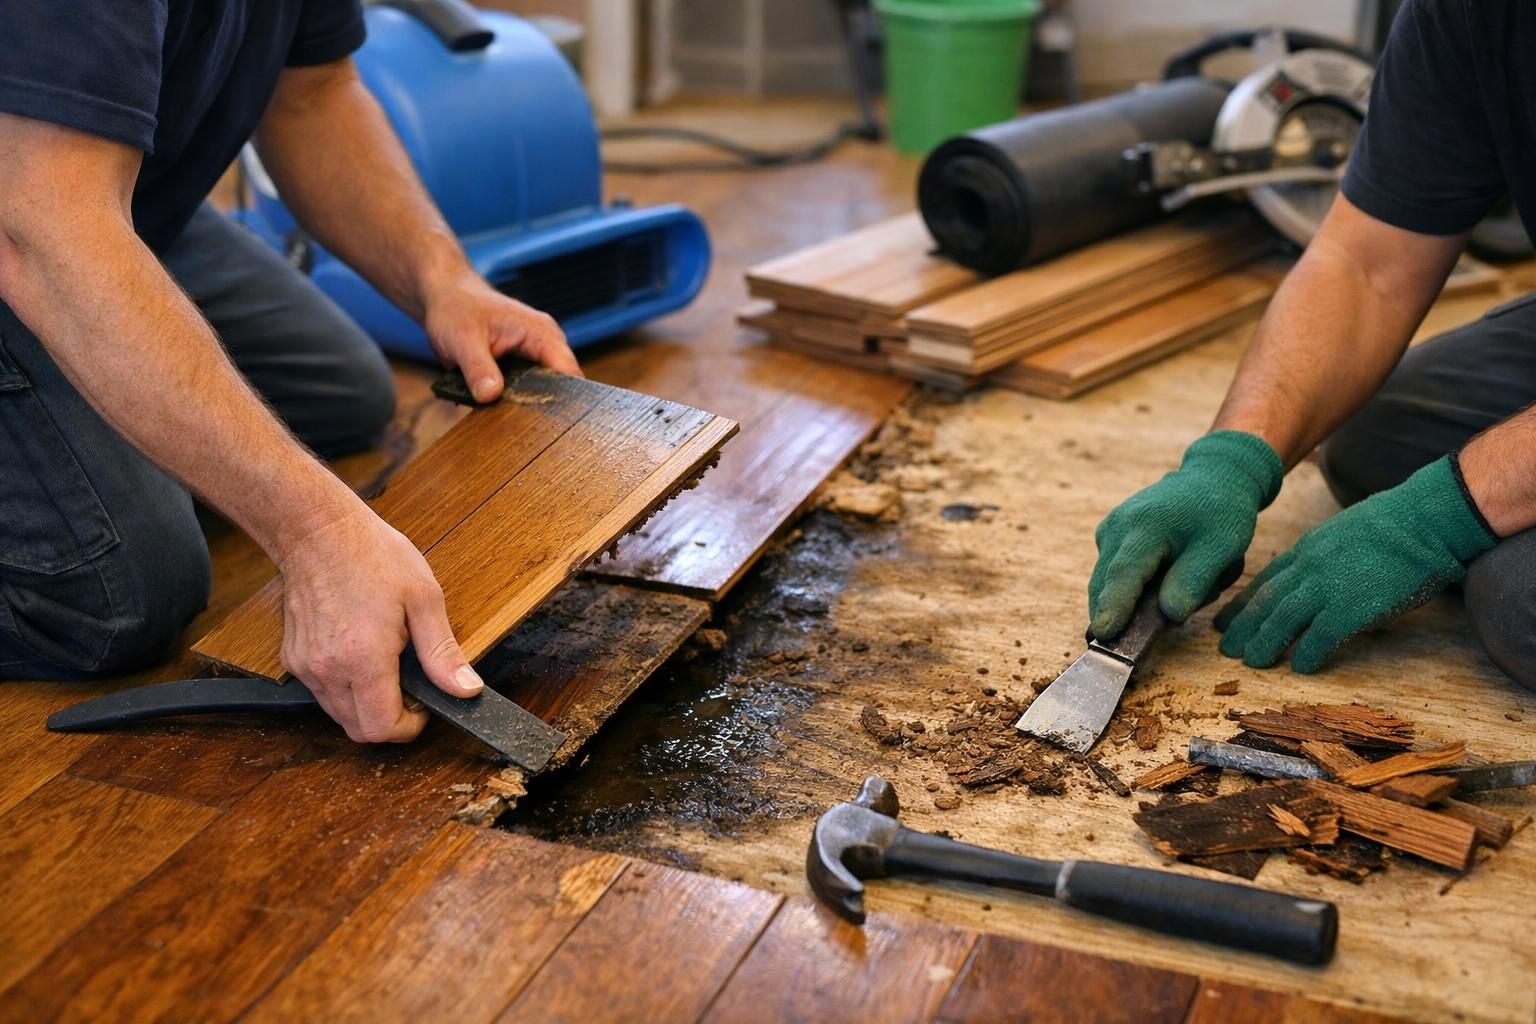
Repair Options for Water-damaged Wood Floors
Options depend on whether boards return close to original shape after drying or stay deformed. A staged approach works best: dry first, wait for movement to slow, then choose sanding/refinishing or board replacement. For major events needing extraction, see emergency water extraction help. Avoid finishing work until moisture is stable.
Drying and Stabilization (Fans/dehumidification)
Sand/refinish Vs. Board Replacement (When Each Makes Sense)
Sand/refinish fits when boards are sound and moisture is normal. Replace boards when planks are buckled, cracked, delaminated, or won’t flatten after drying. It’s cosmetics versus carpentry.
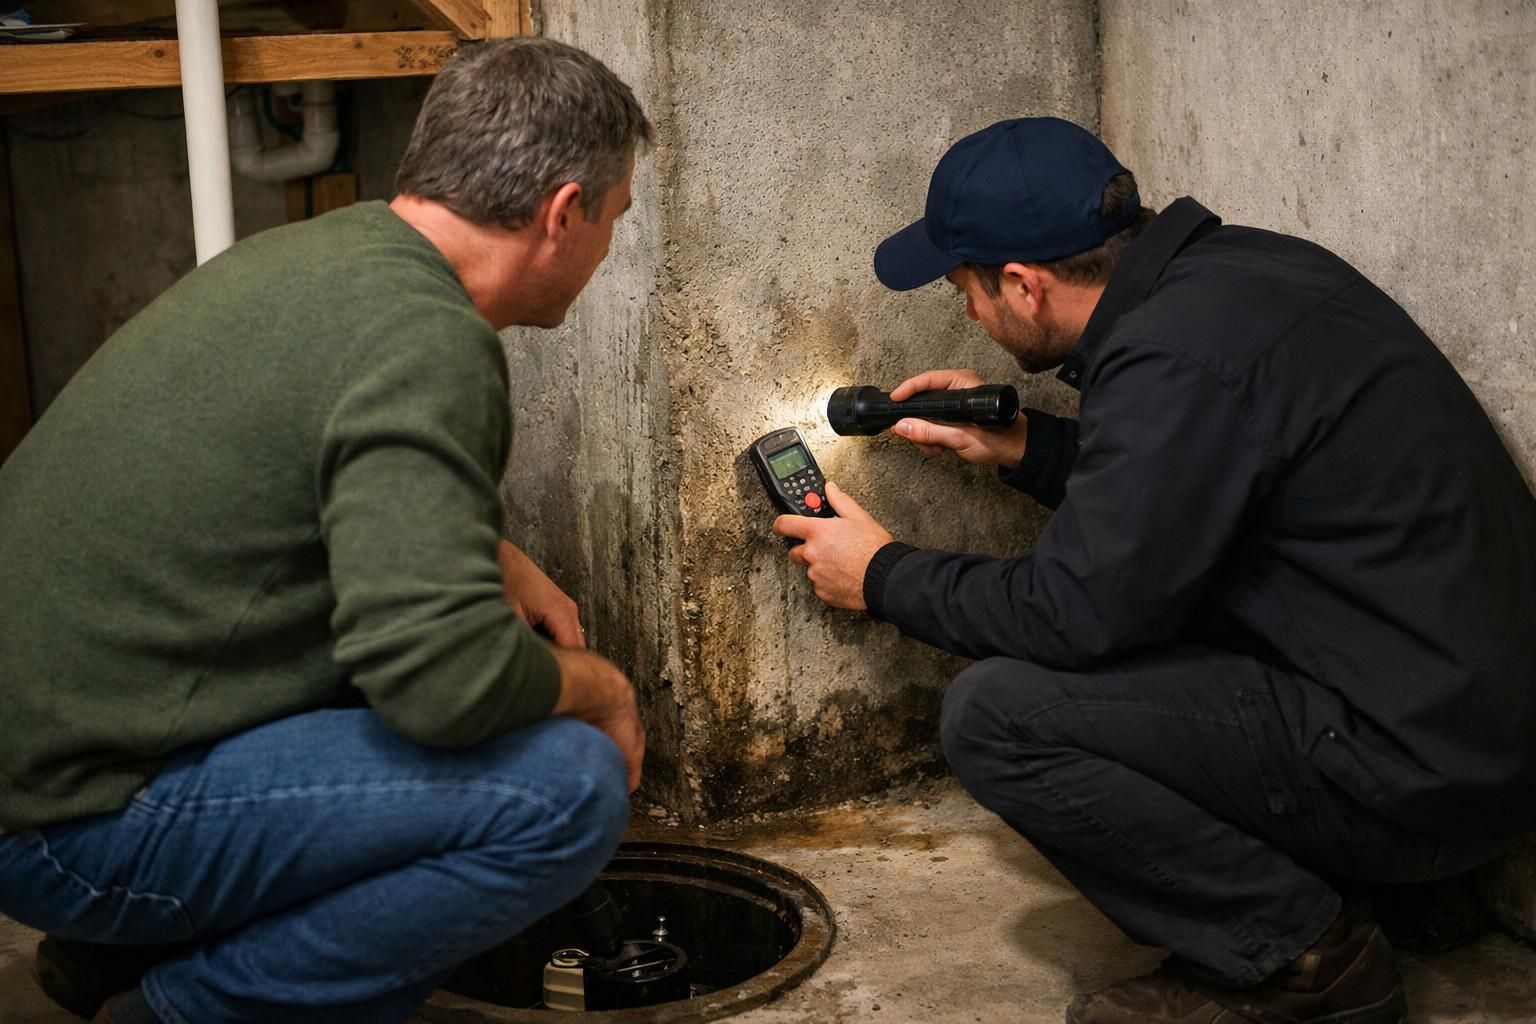
When to Call a Professional (and Why Timing Matters)
Call a professional when damage may extend below the surface or you need certainty before rebuilding. Restoration pros use moisture mapping, targeted drying, and inspection to find wet subfloor areas you can’t see. Timing matters because trapped moisture can feed mold and lead to later floor failure. If the leak came from a wall or ceiling, see what to do about wall leaks.
Mold Risk and Hidden Moisture Warning Signs
Risk rises with musty odor, recurring condensation, or seam darkening that returns. Hidden moisture shows as morning cupping, damp baseboards, or soft edges. If you suspect growth, seek proper remediation.
Costs and Insurance Basics (Typical Ranges and Documentation)
Costs depend on water type, affected size, how deep moisture traveled, and repair versus replacement. Equipment, board removal/reinstall, subfloor work, and refinishing add cost. For insurance, document everything: photos/videos, dates, actions taken, and receipts. Record the source too, such as a fridge line; see refrigerator leak causes.
Conclusion
Wood floors can recover from water exposure when you act fast, dry in a controlled way, and confirm moisture levels before refinishing. The decision to repair vs. replace usually comes down to stability: if boards flatten out and the subfloor stays dry, refinishing or limited plank swaps may be enough. If buckling, softness, odor, or continued movement persists, prioritize inspection and professional drying to prevent repeat damage.